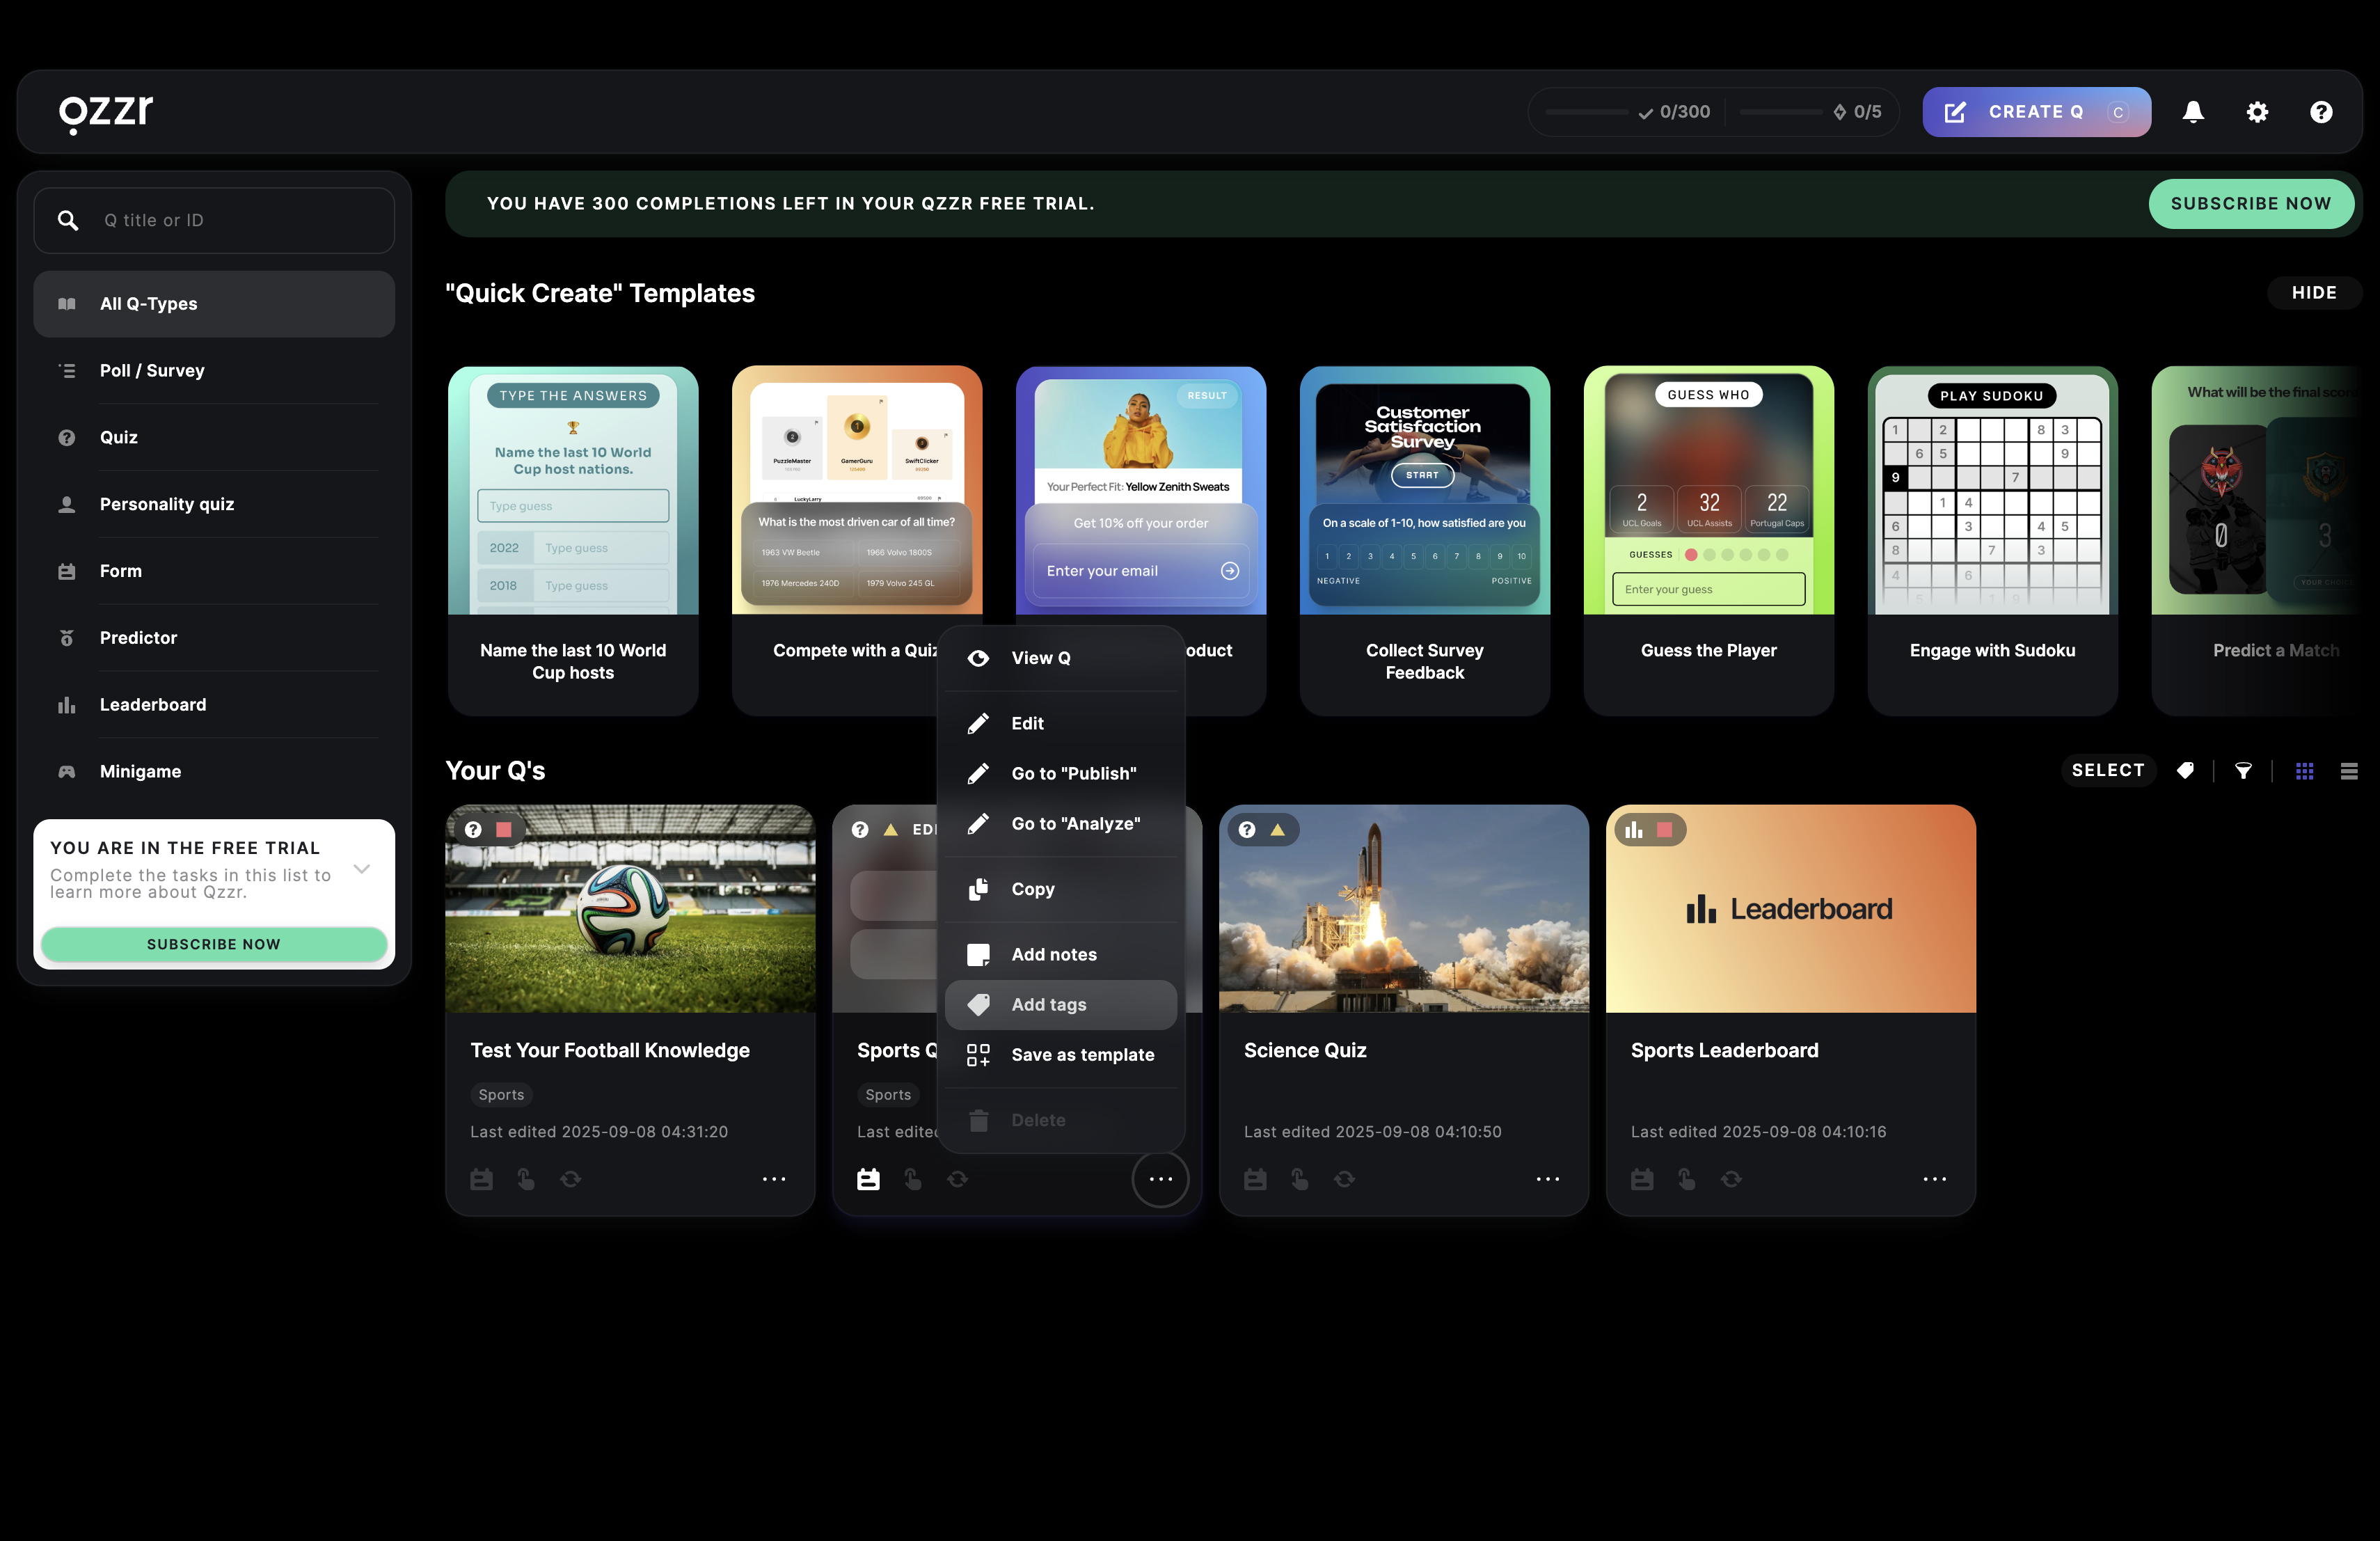
Organize your Qs
You can organize your content in different ways to make sure you can access and work with your creations quickly and easily.
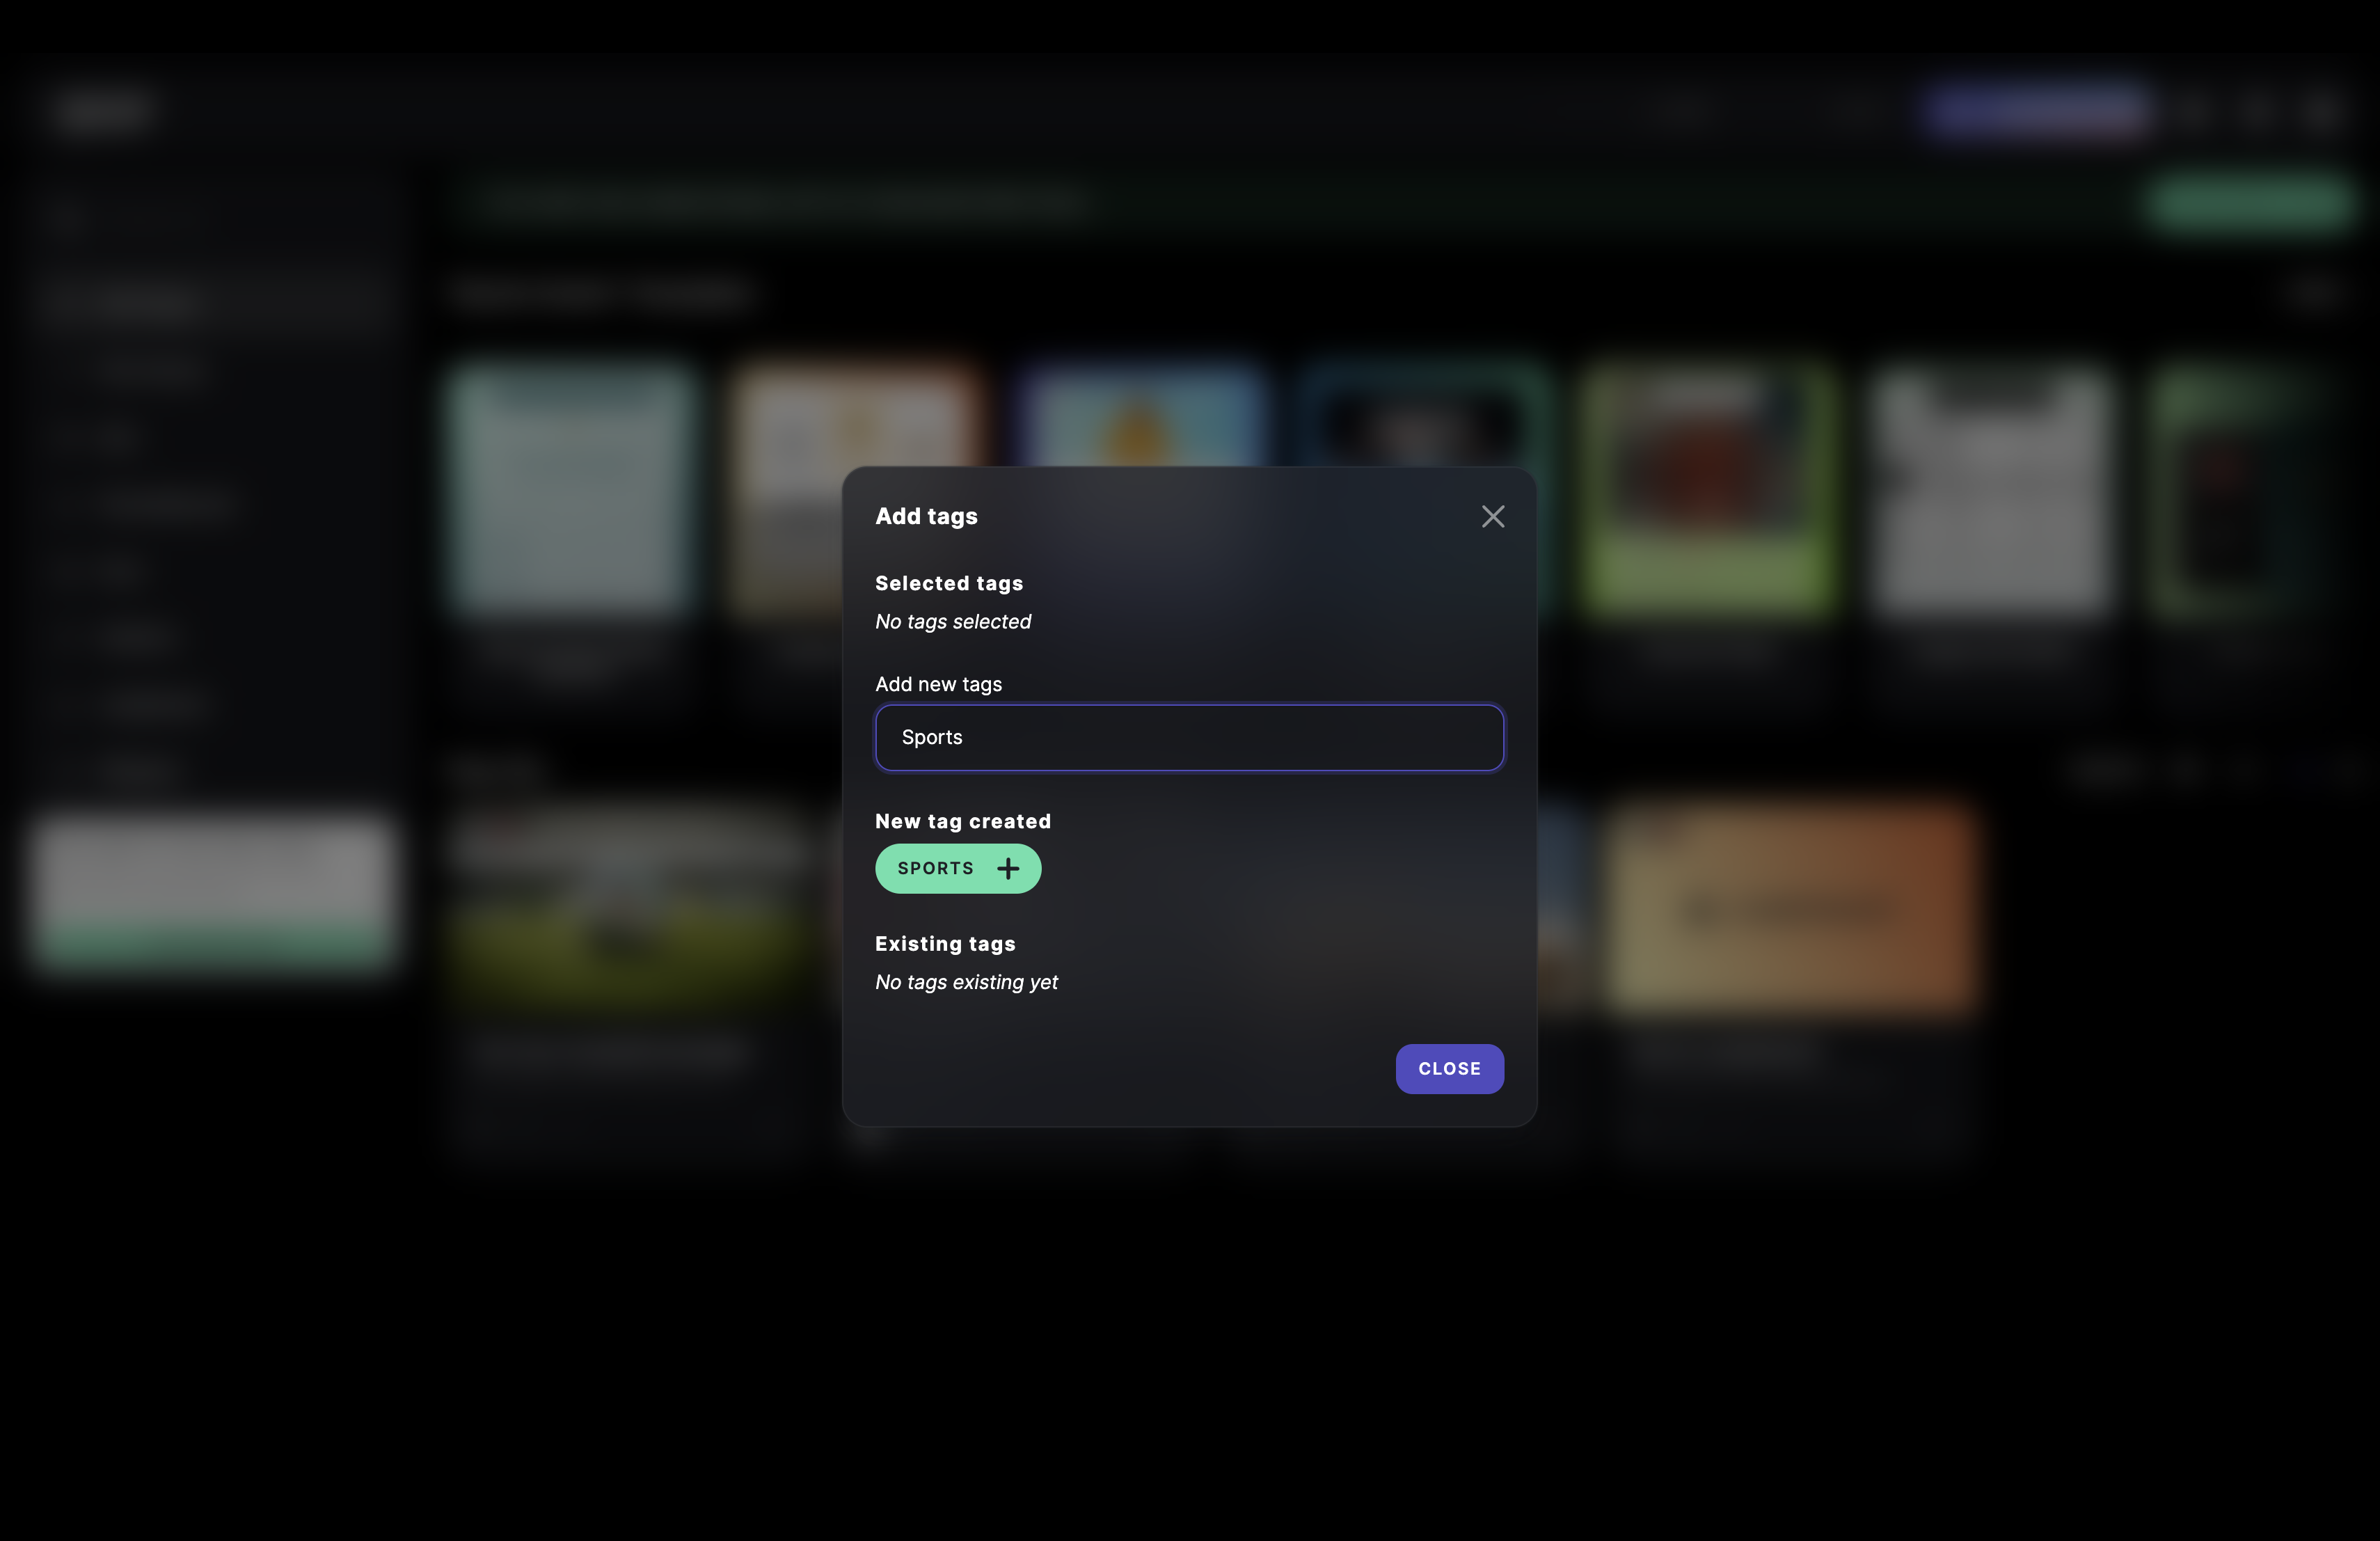
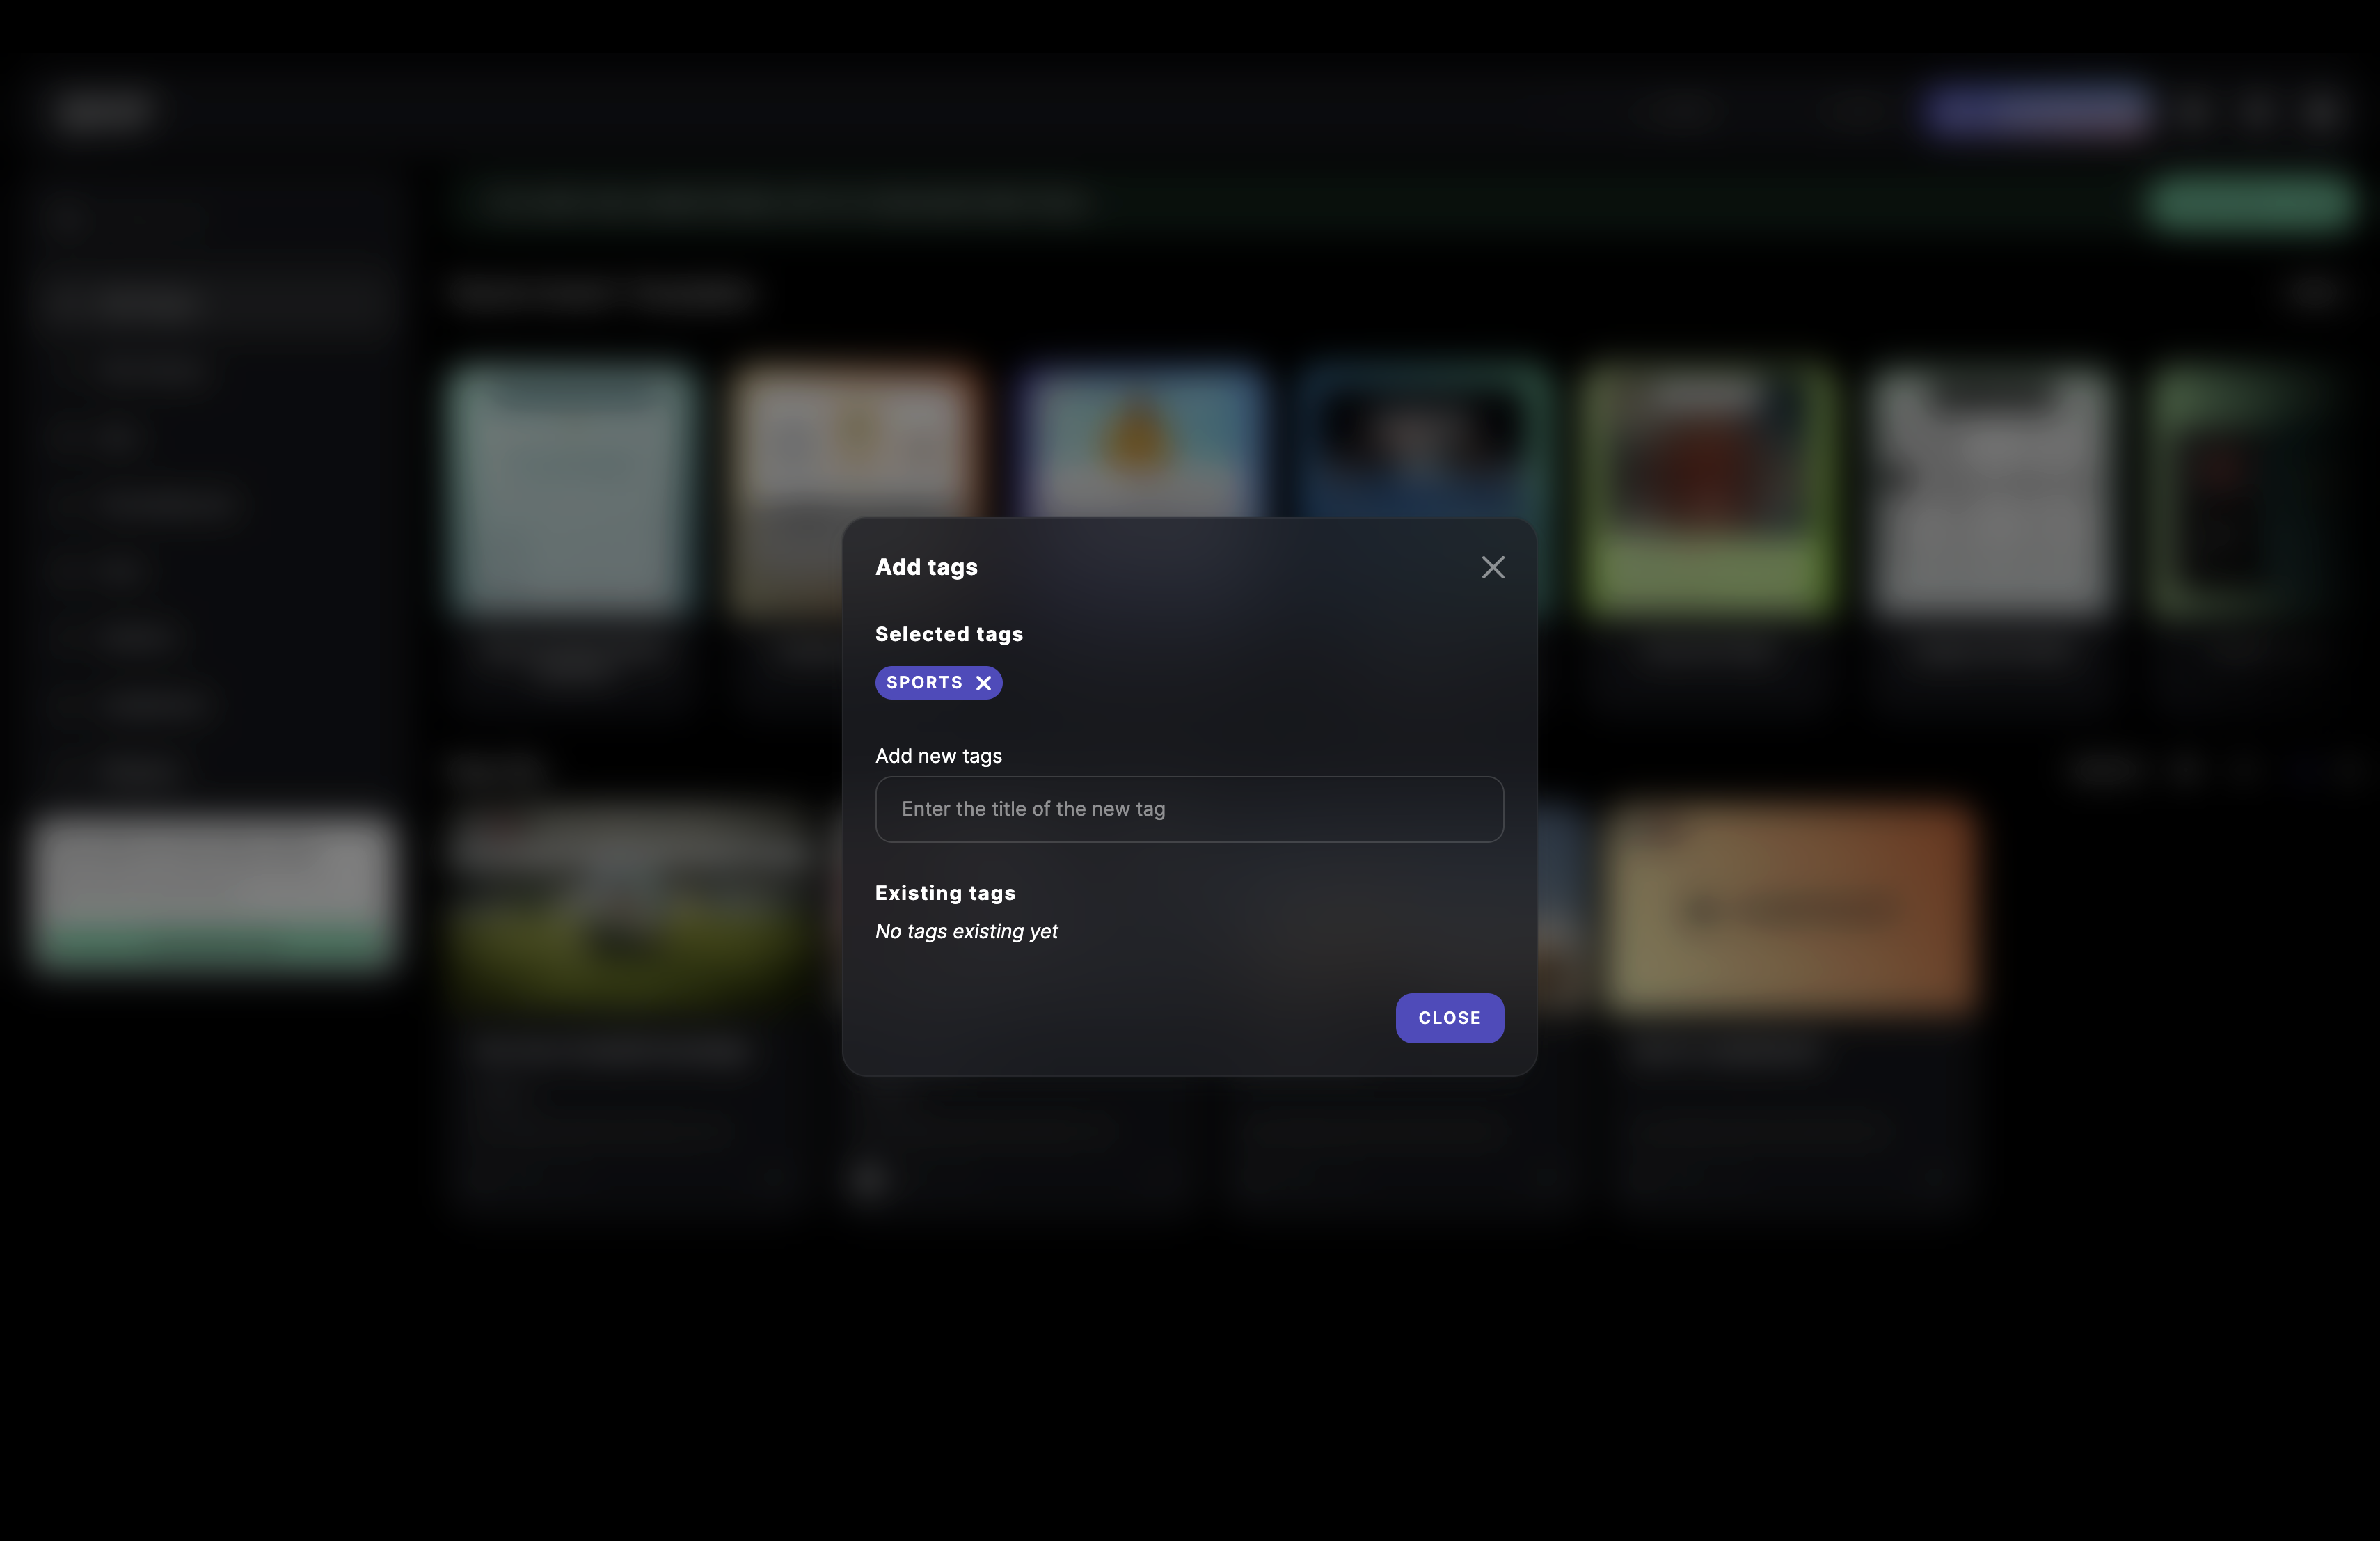
Add a new tag
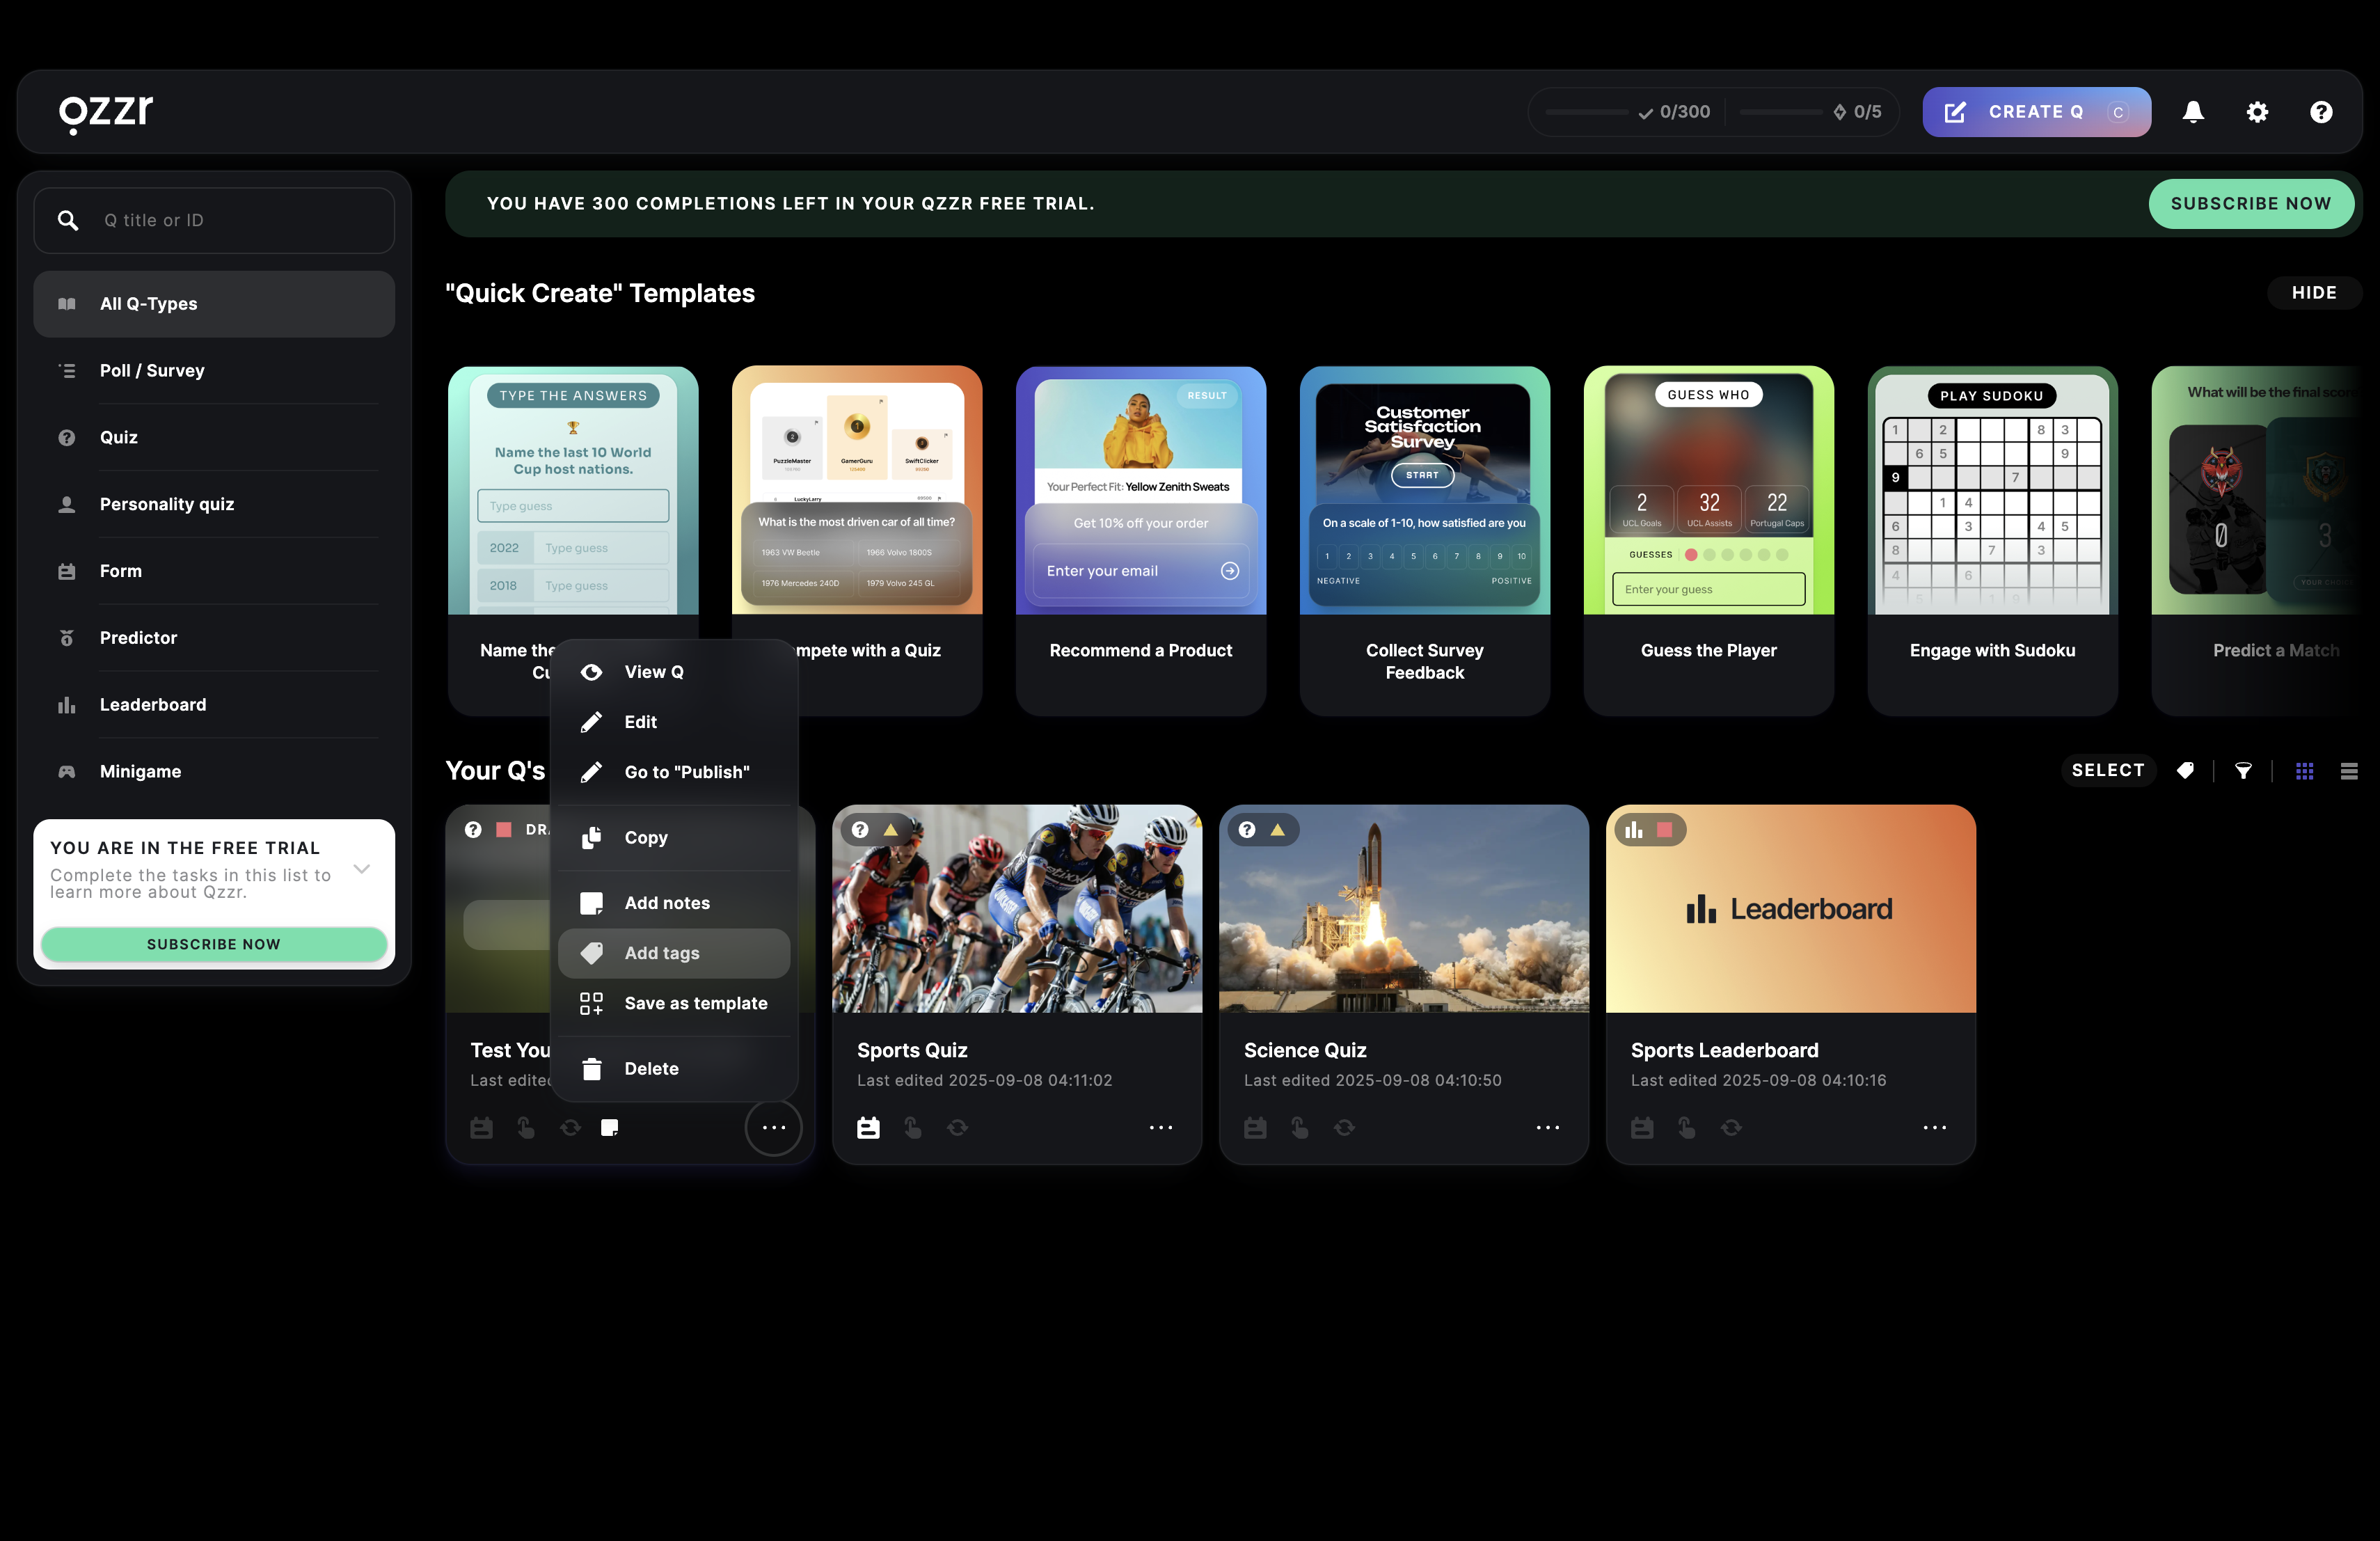
- In the Creator, click on the three dots next to the content and click on ADD TAGS.
- Enter your tag name into the Add new tags field. The created tag will appear in green under New tag created.

- Click on that tag to add it to this Q and click on CLOSE.
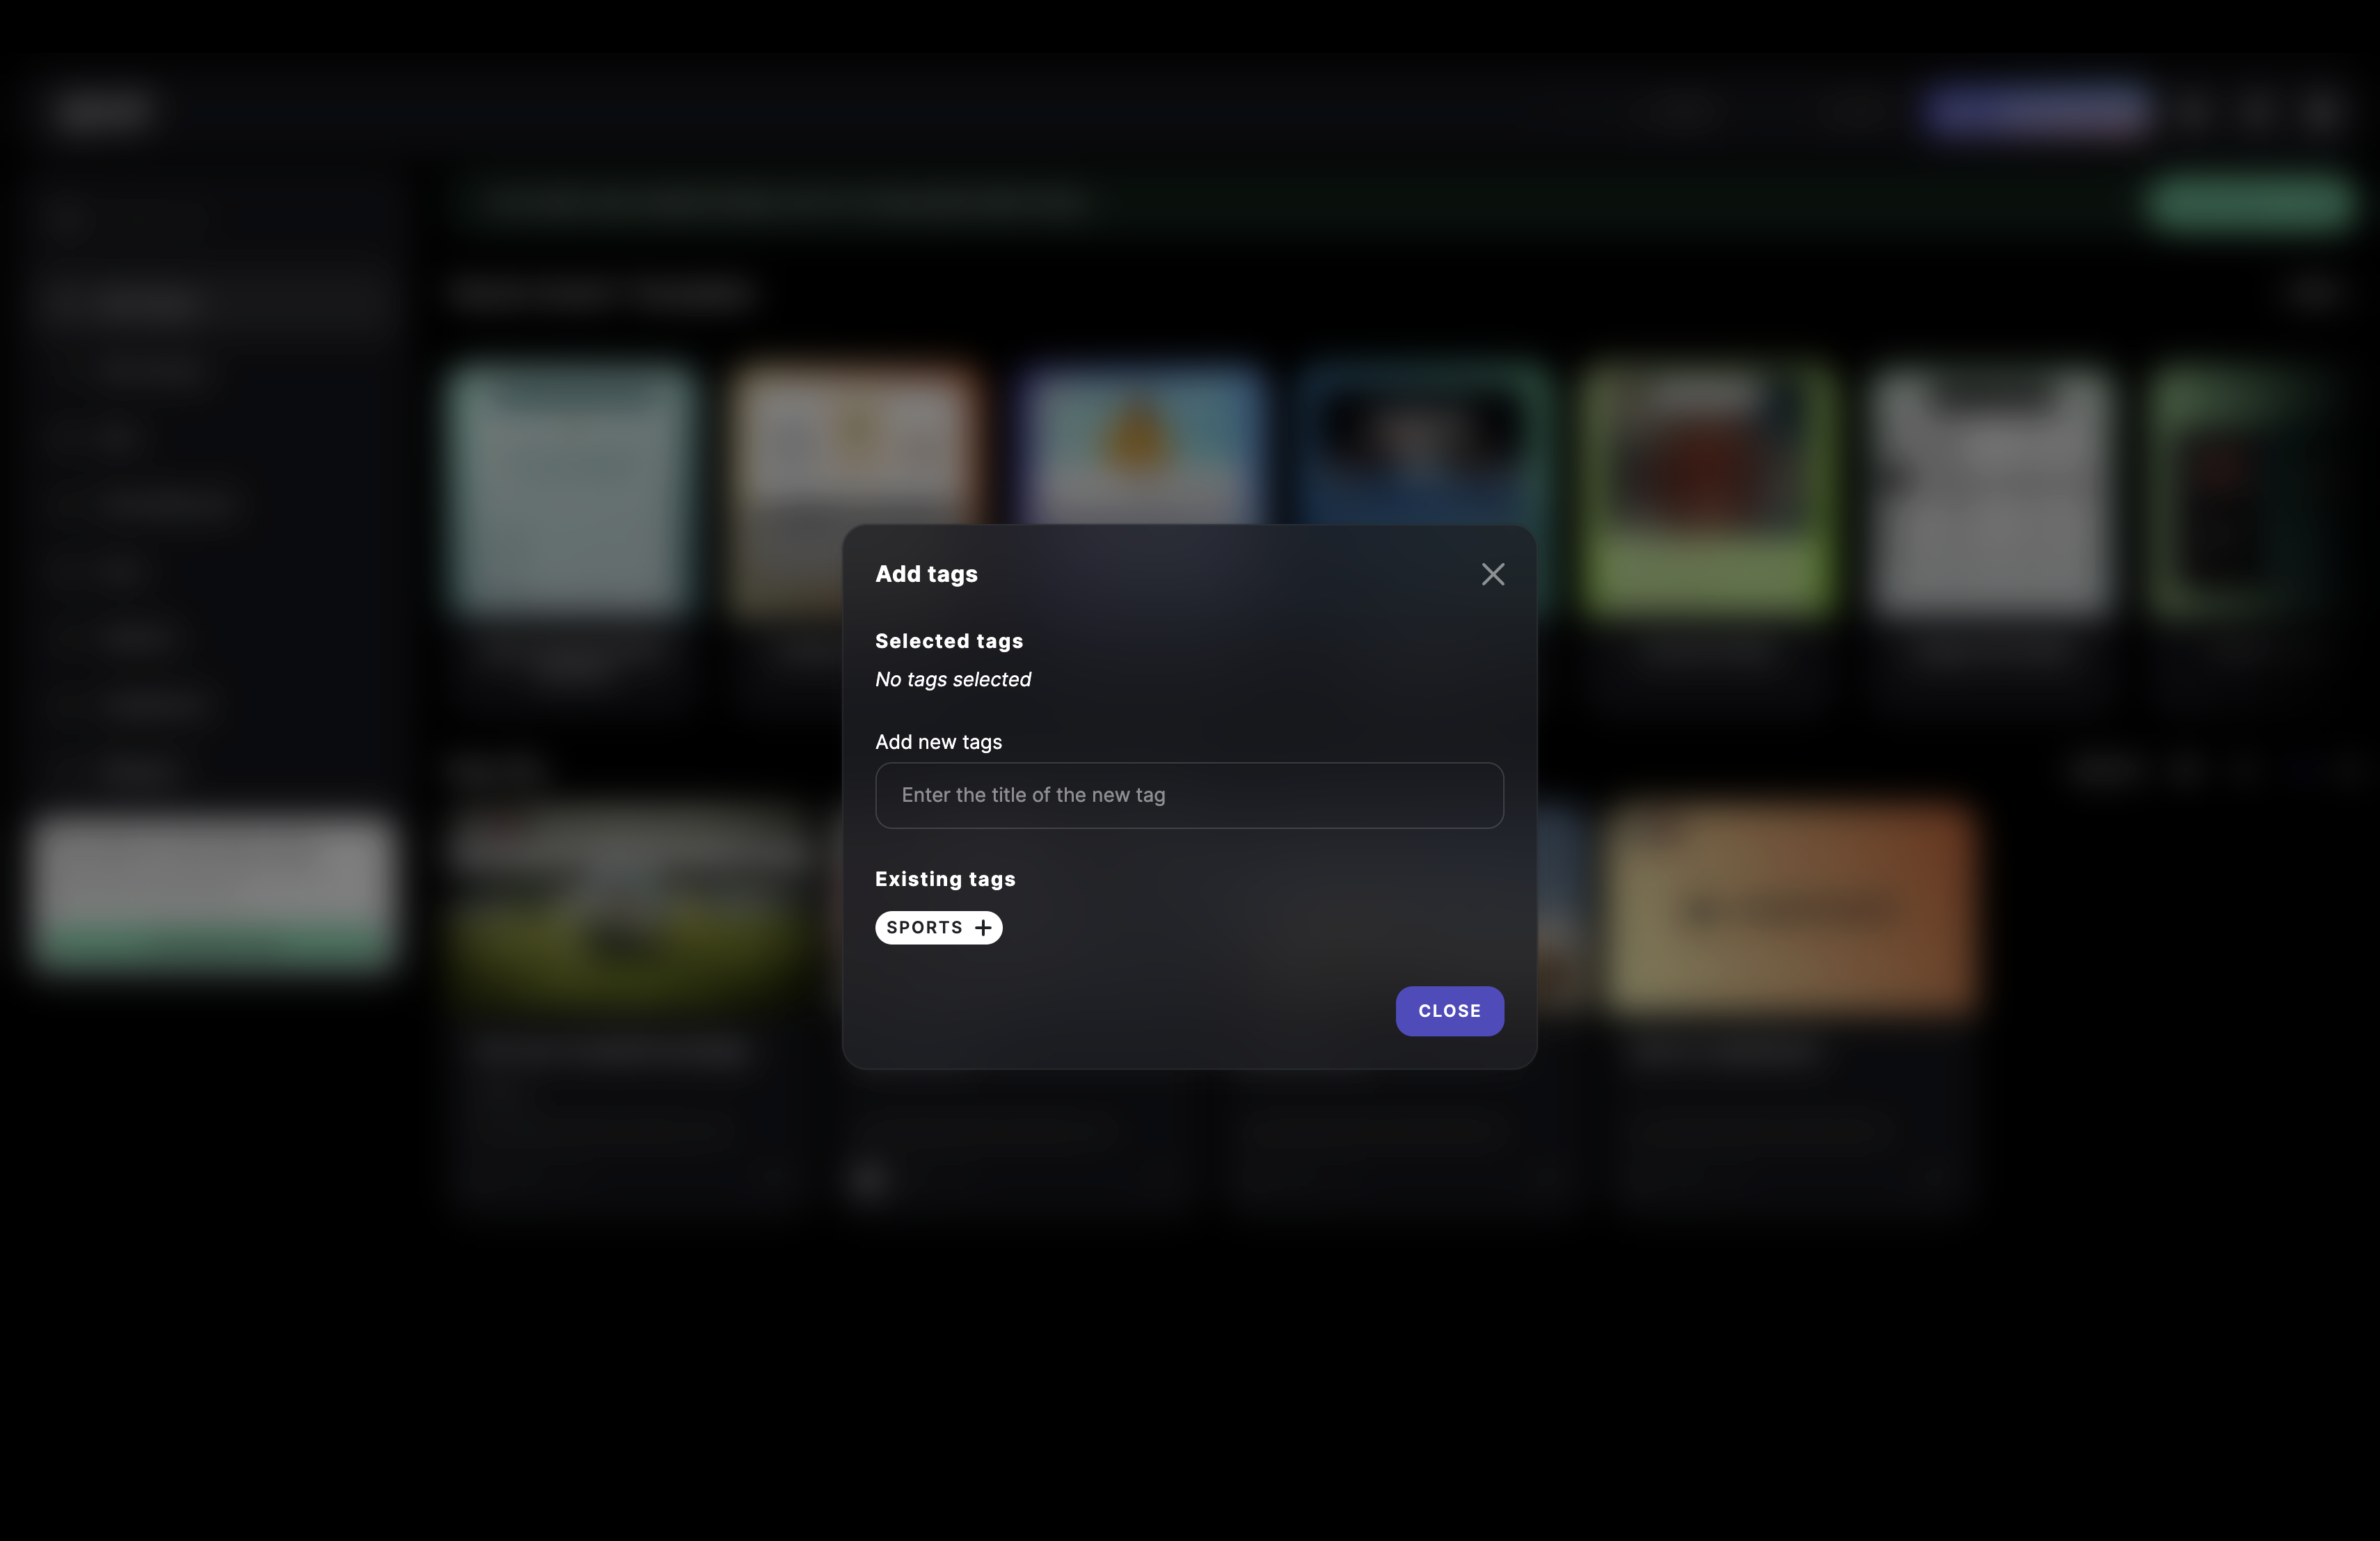
Add an existing tag to content
- In the Creator, click on the three dots next to the content and click on ADD TAGS.

- Select an existing tag and click on CLOSE.
Remove a tag from content
- In the Creator, click on the three dots next to the Q and click on ADD TAGS.
- Current tags will appear in purple under Selected tags. Click on any selected tag and click on CLOSE.
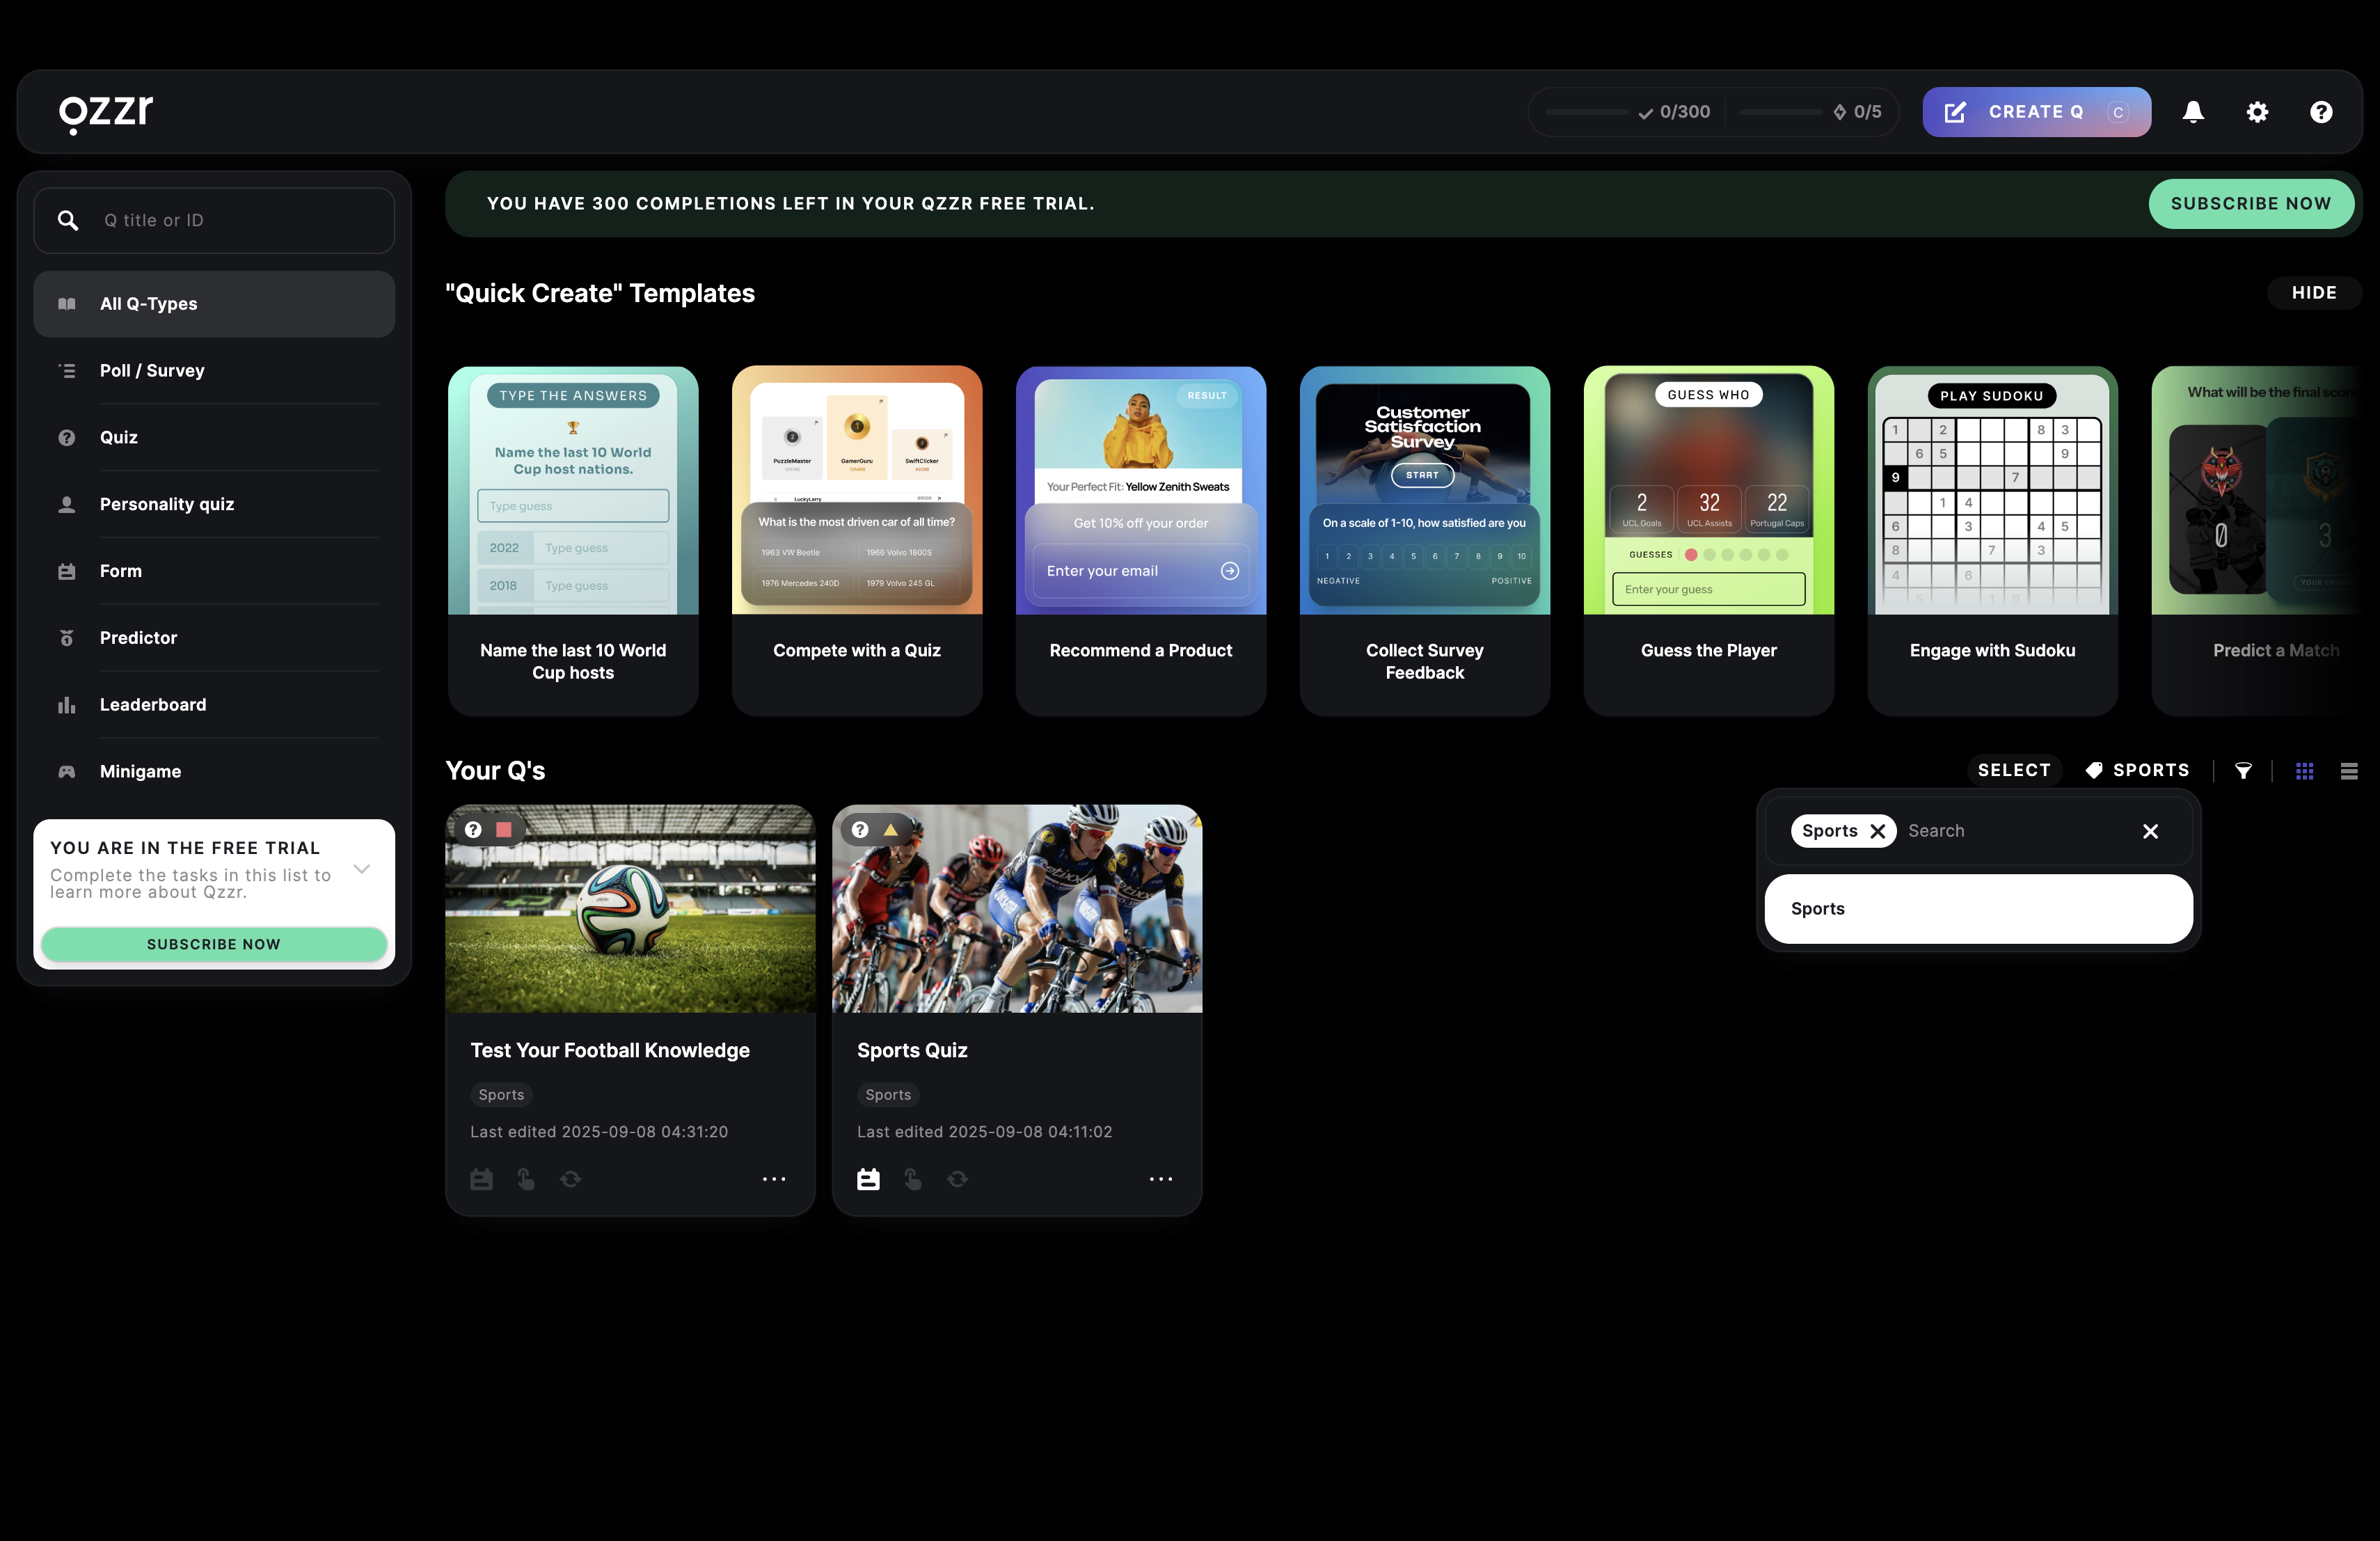
View content by tag
- In the Creator, click on the tag icon top right and select the tag you want to filter by.
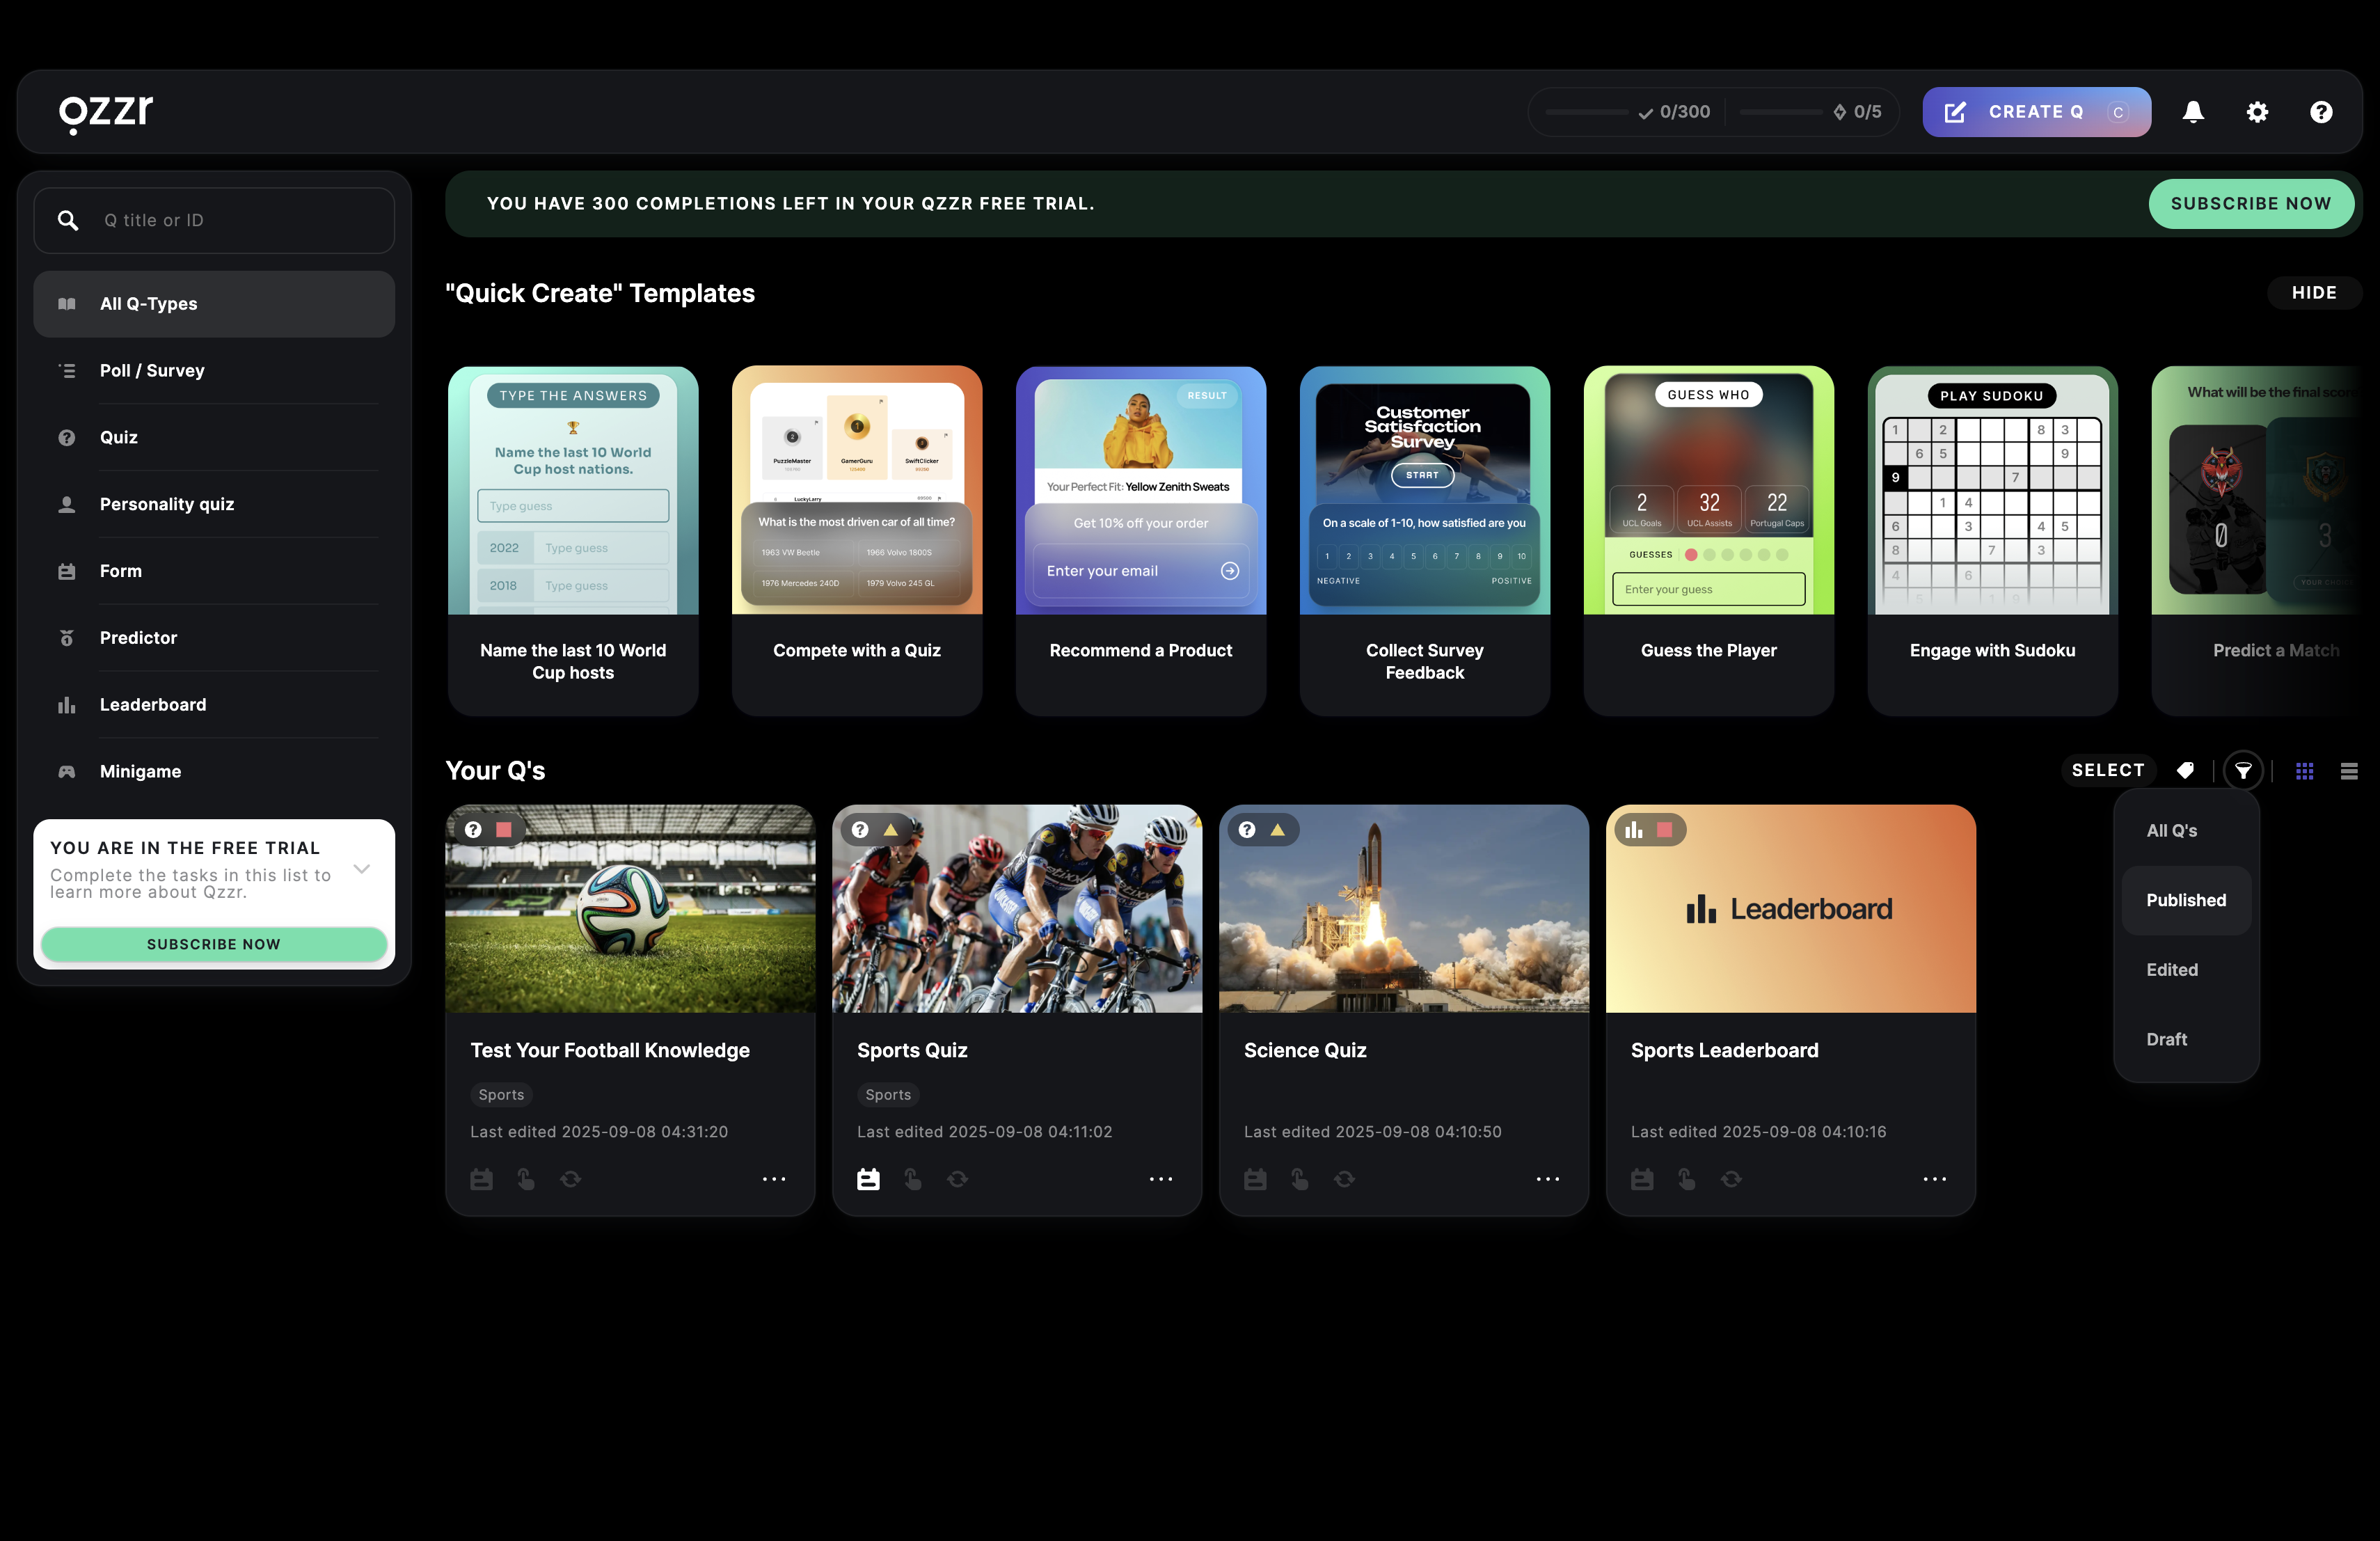
Filter your content by status
- In the Creator, click on the filter icon top right and select a filter from the dropdown menu.
Add notes to a content
- In the Creator, click on the three dots next to the content and click on ADD NOTES.

- Enter your notes into the text field and click on SAVE NOW.
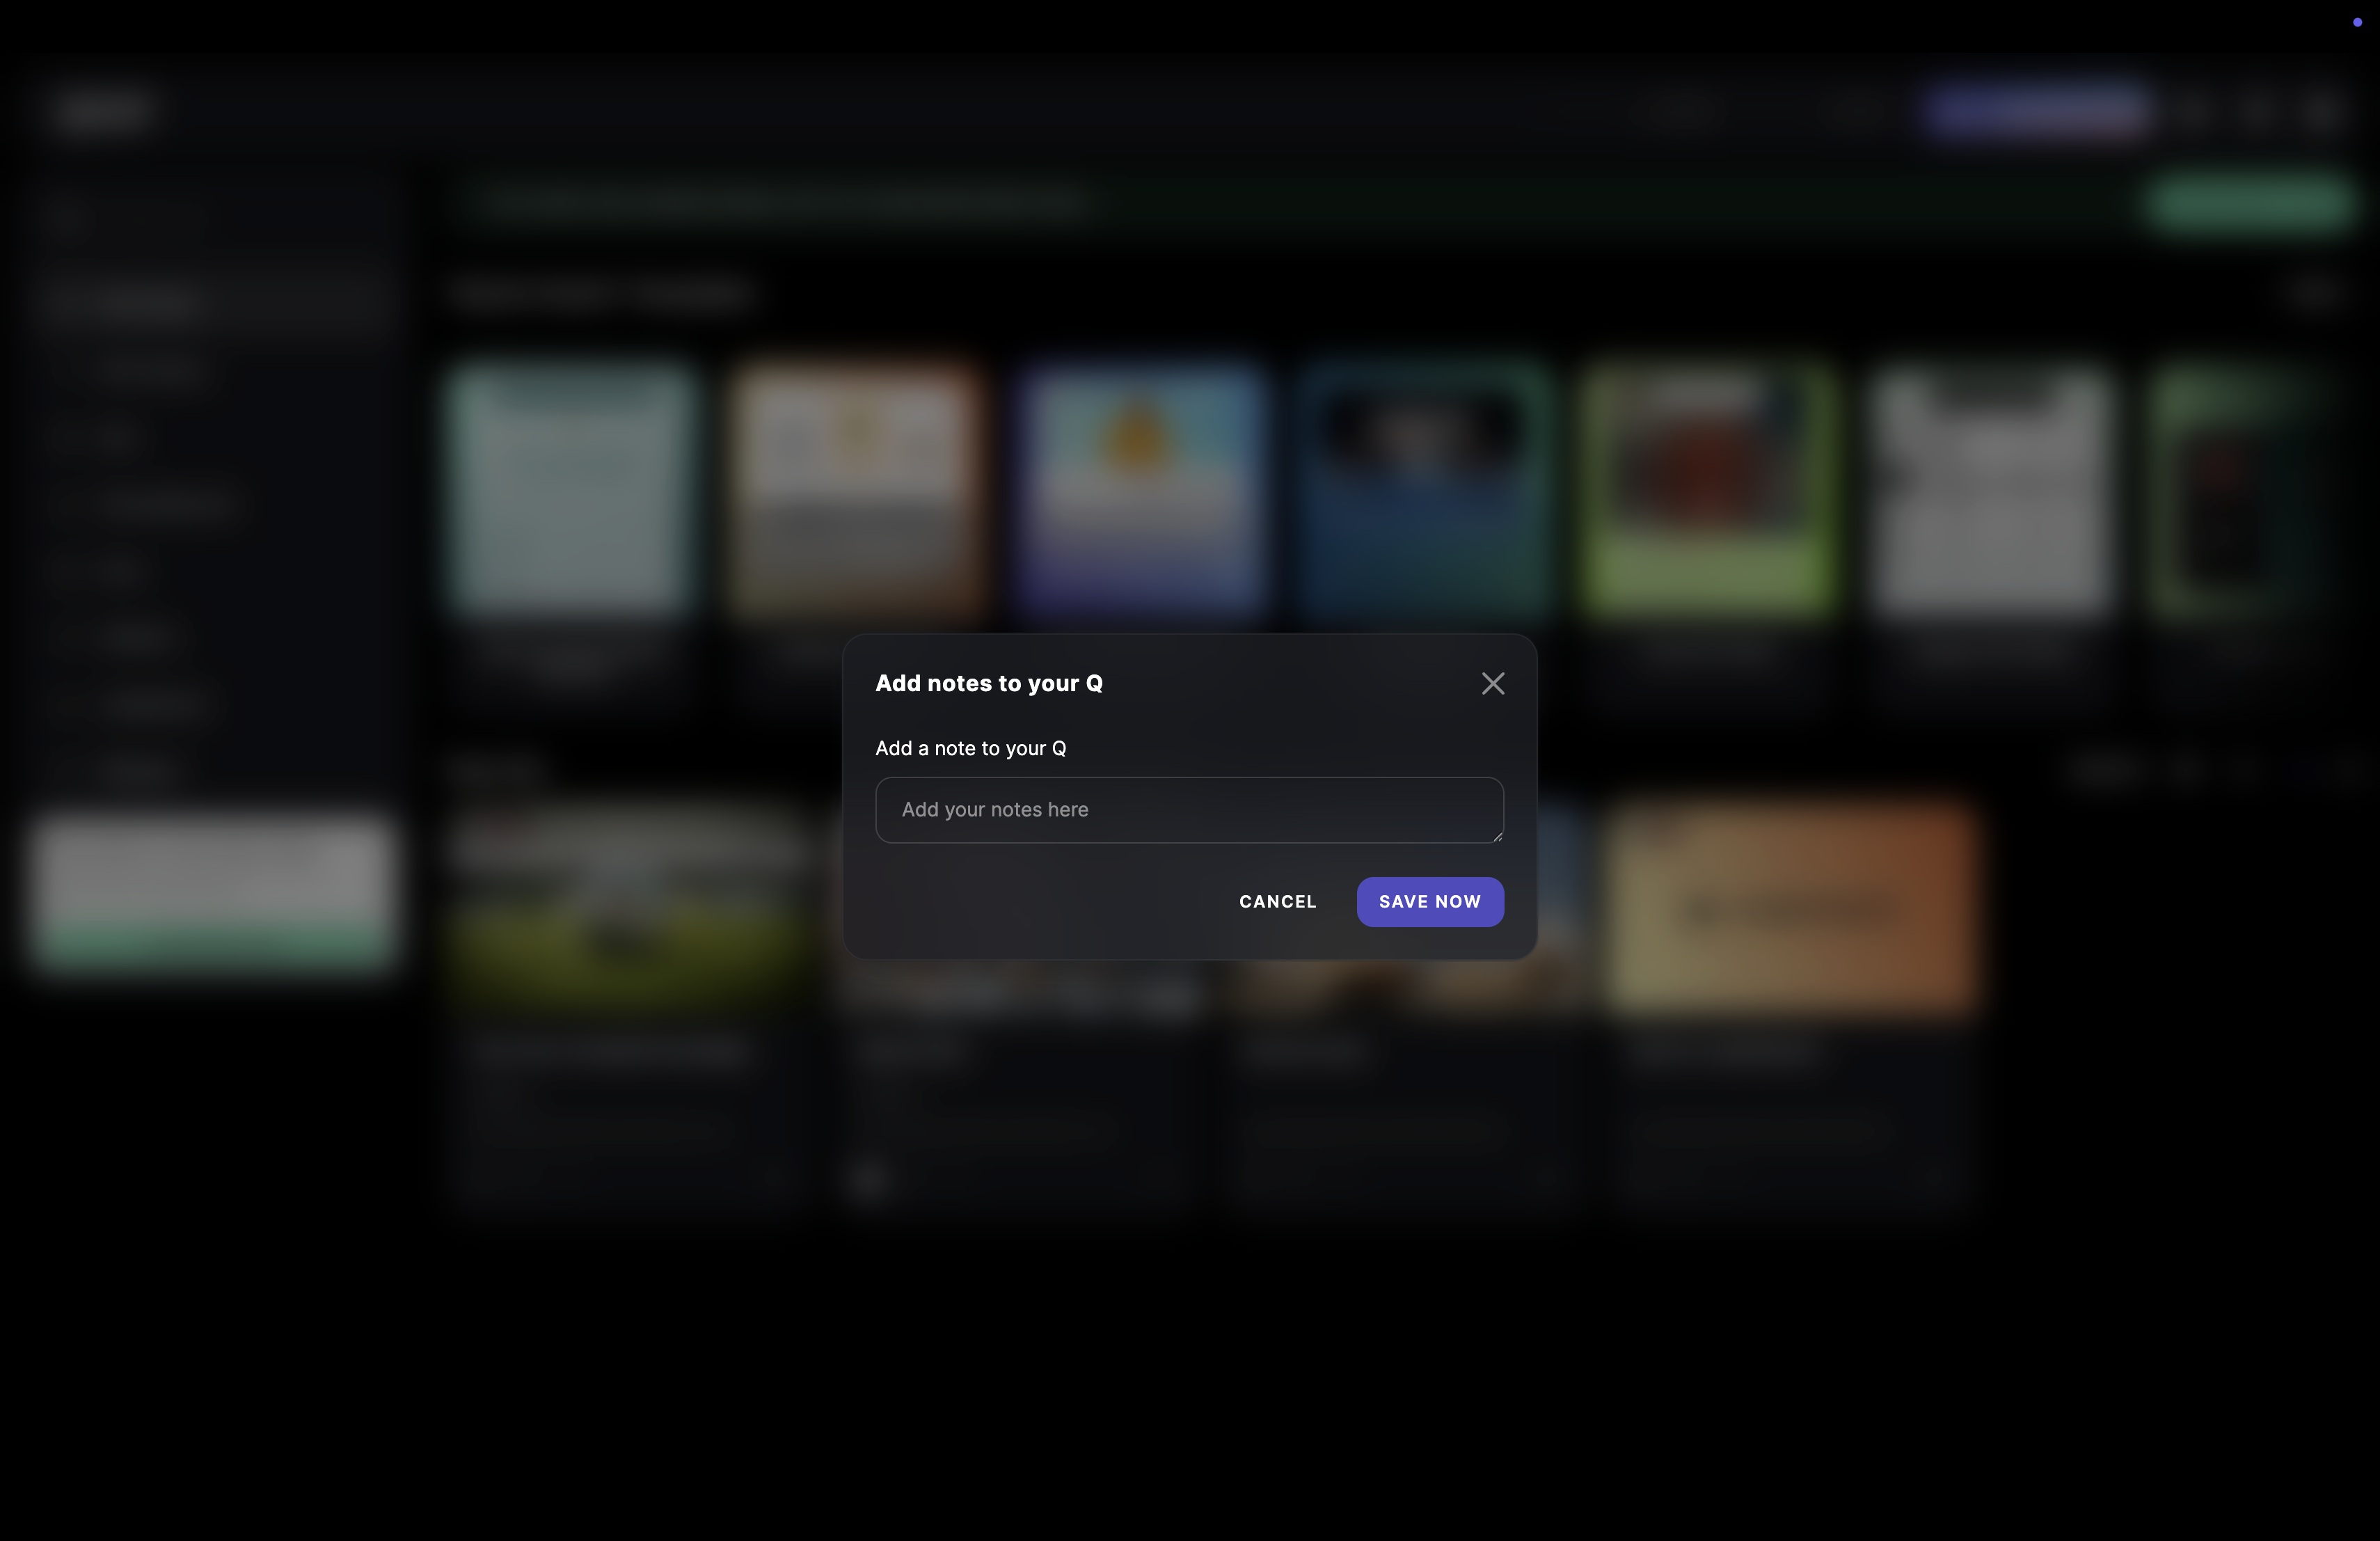
Any content that has notes will have a post-it icon.
These notes are just for you or your colleagues, not your audience. You can make notes about different versions or recent changes, for example.
View or edit content notes
- In the Creator, click on the post-it icon under/next to your content. If you edit the note, click on SAVE NOW.

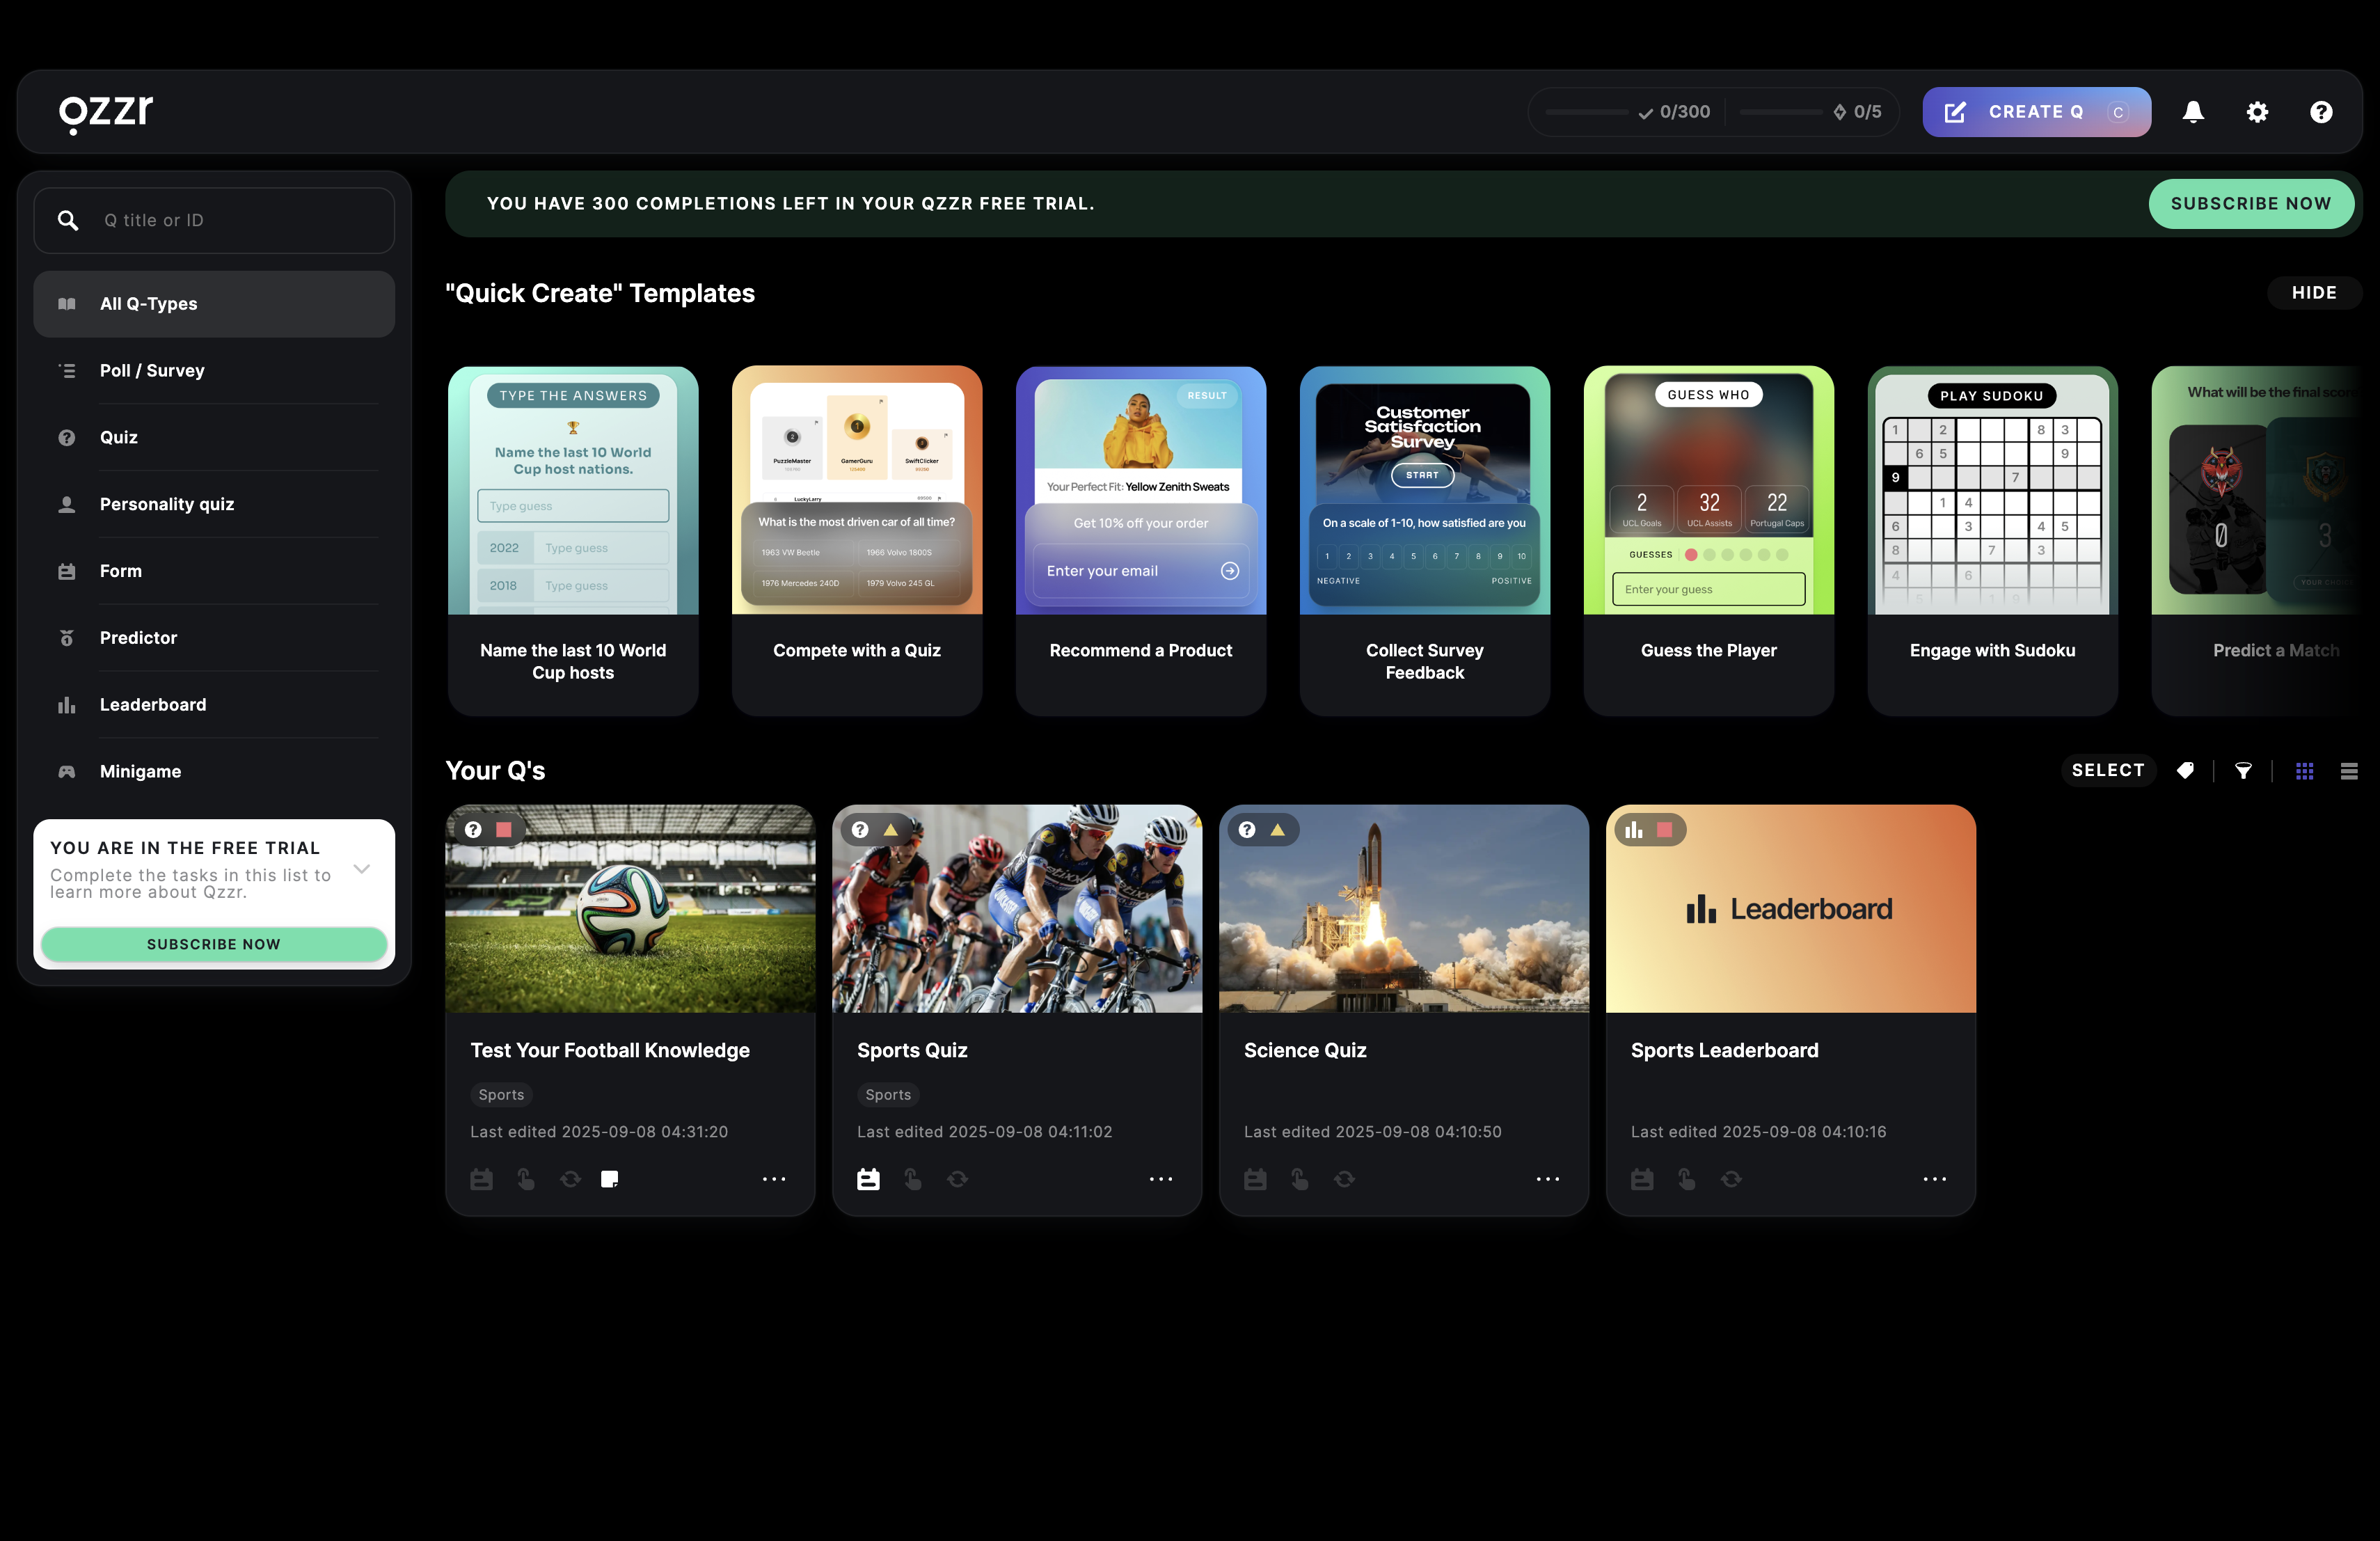
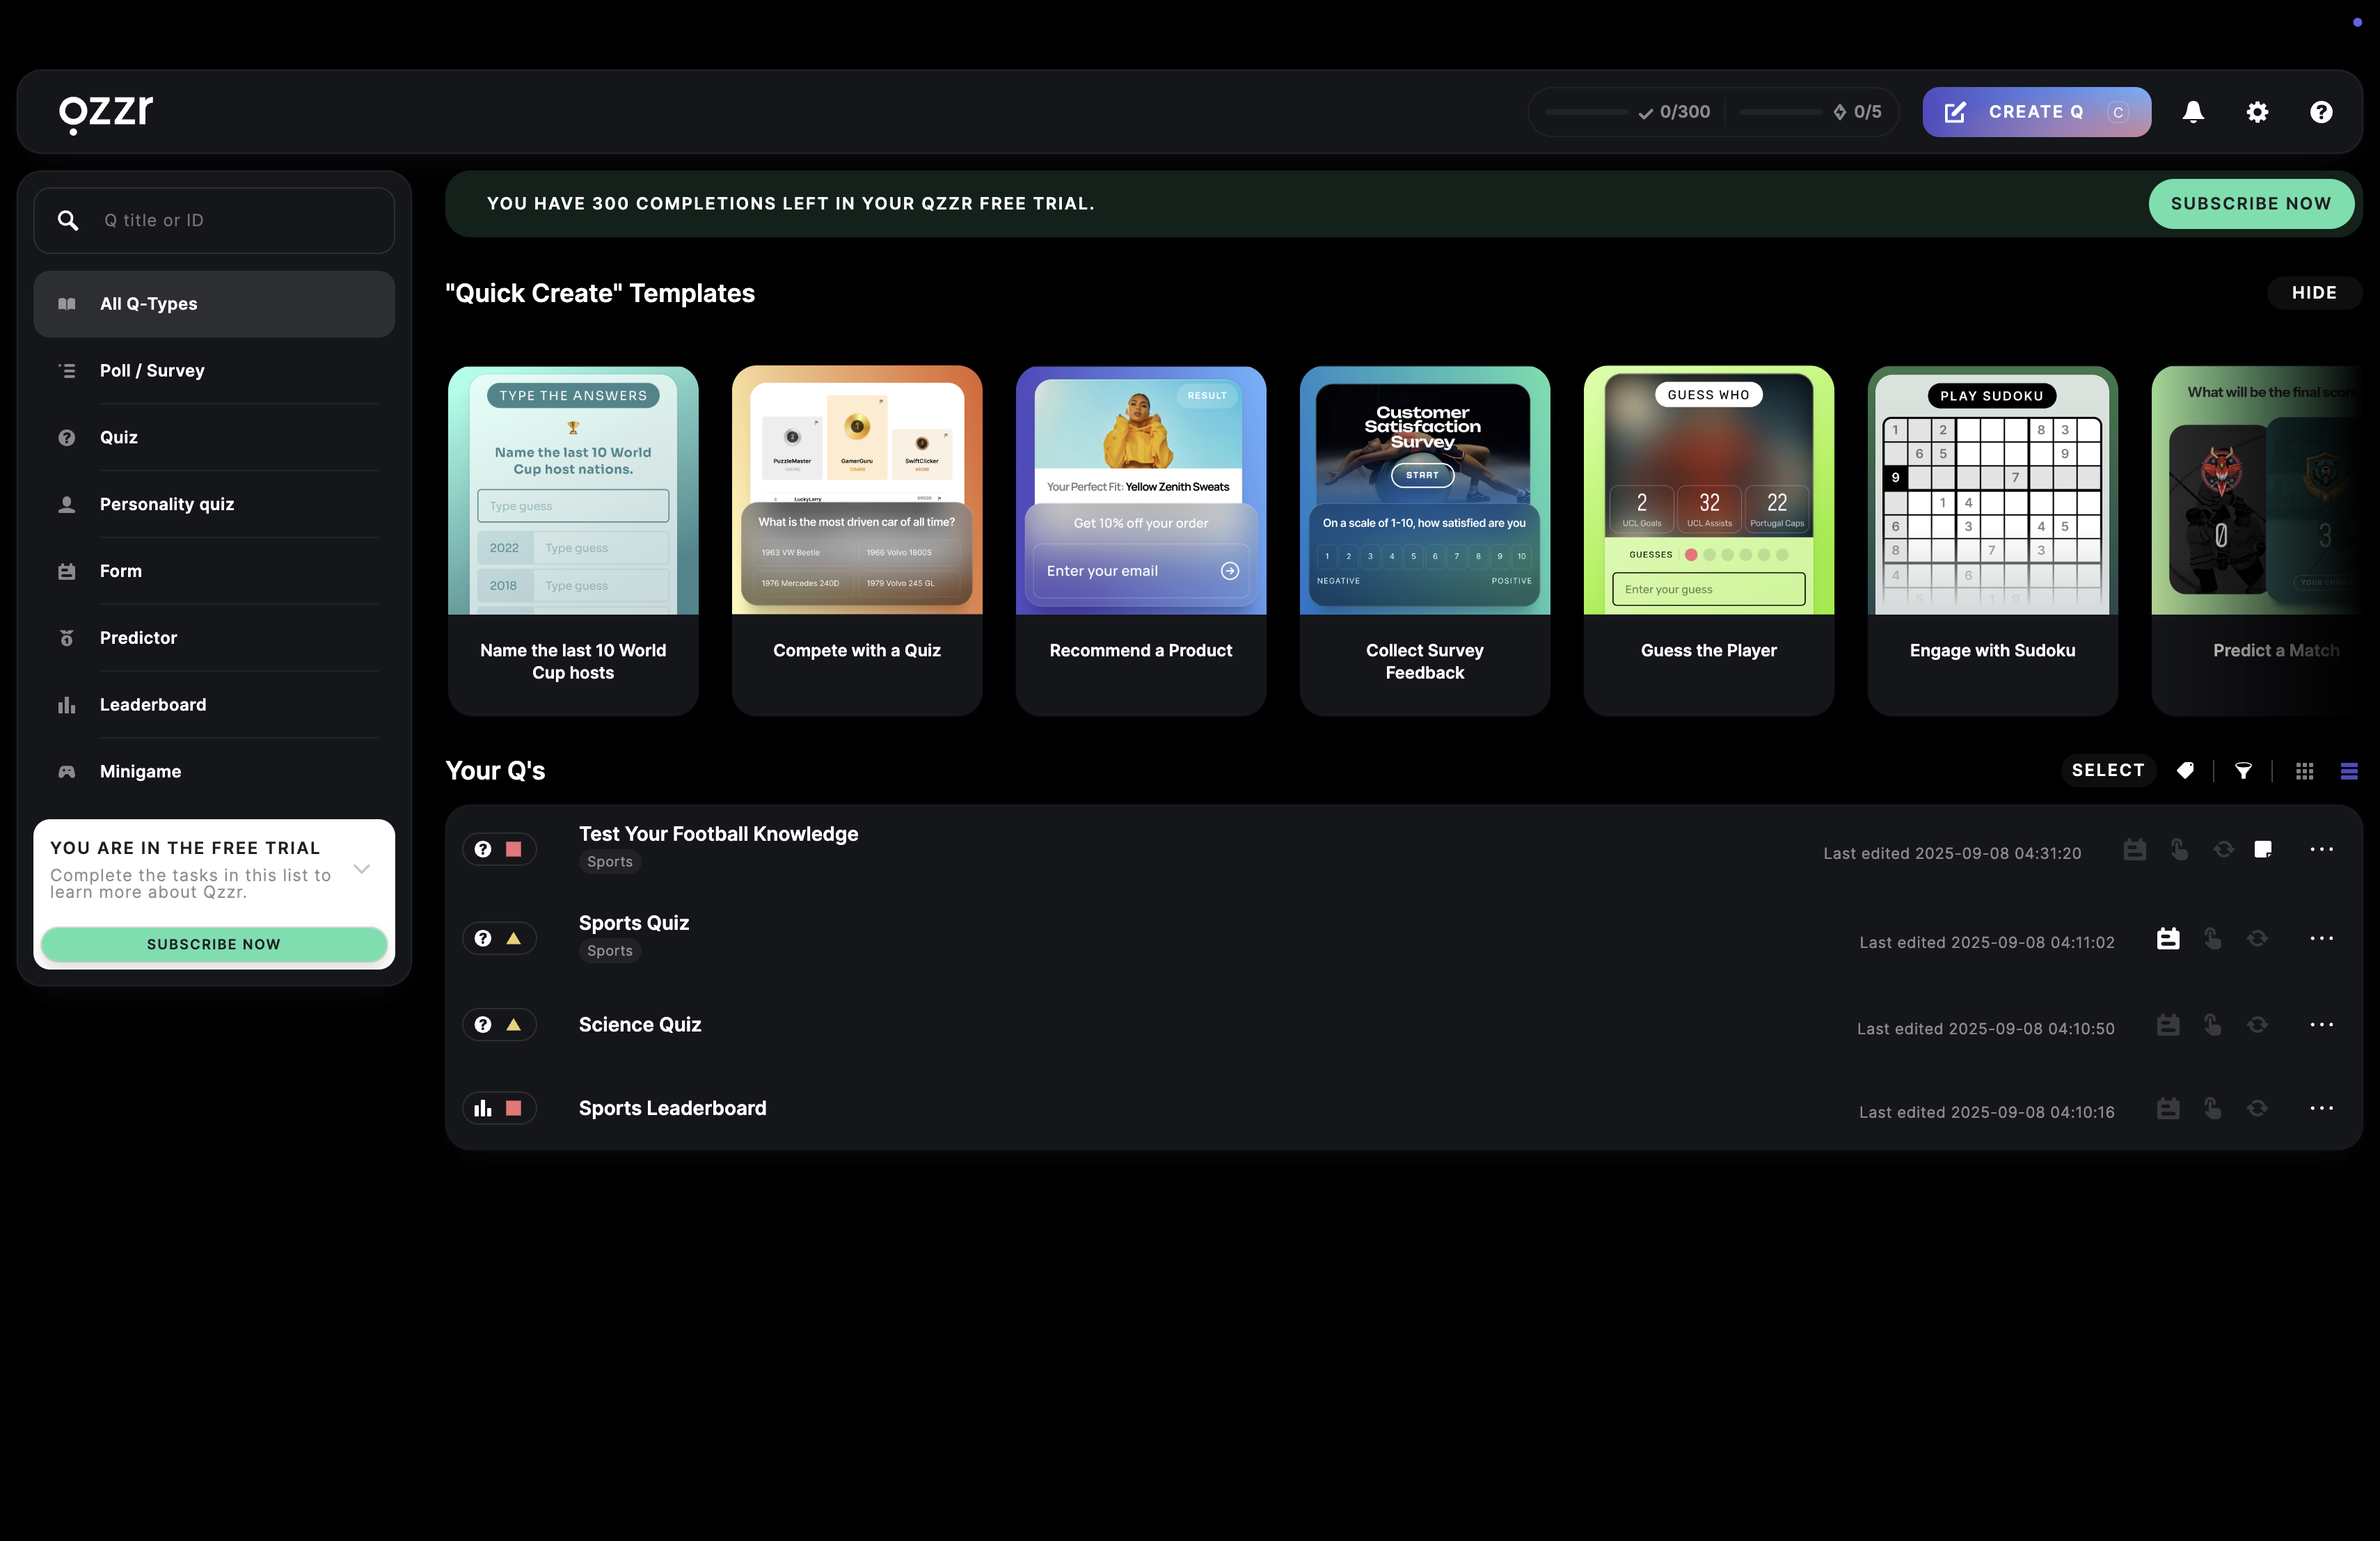
Switch content view
- In the Creator, select the grid view icon top right to see your content in rows of four with their cover picture, title, and further information underneath or on hover.
- In the Creator, select the list view icon top right to see your content as a list of titles on the left with their information on the right.
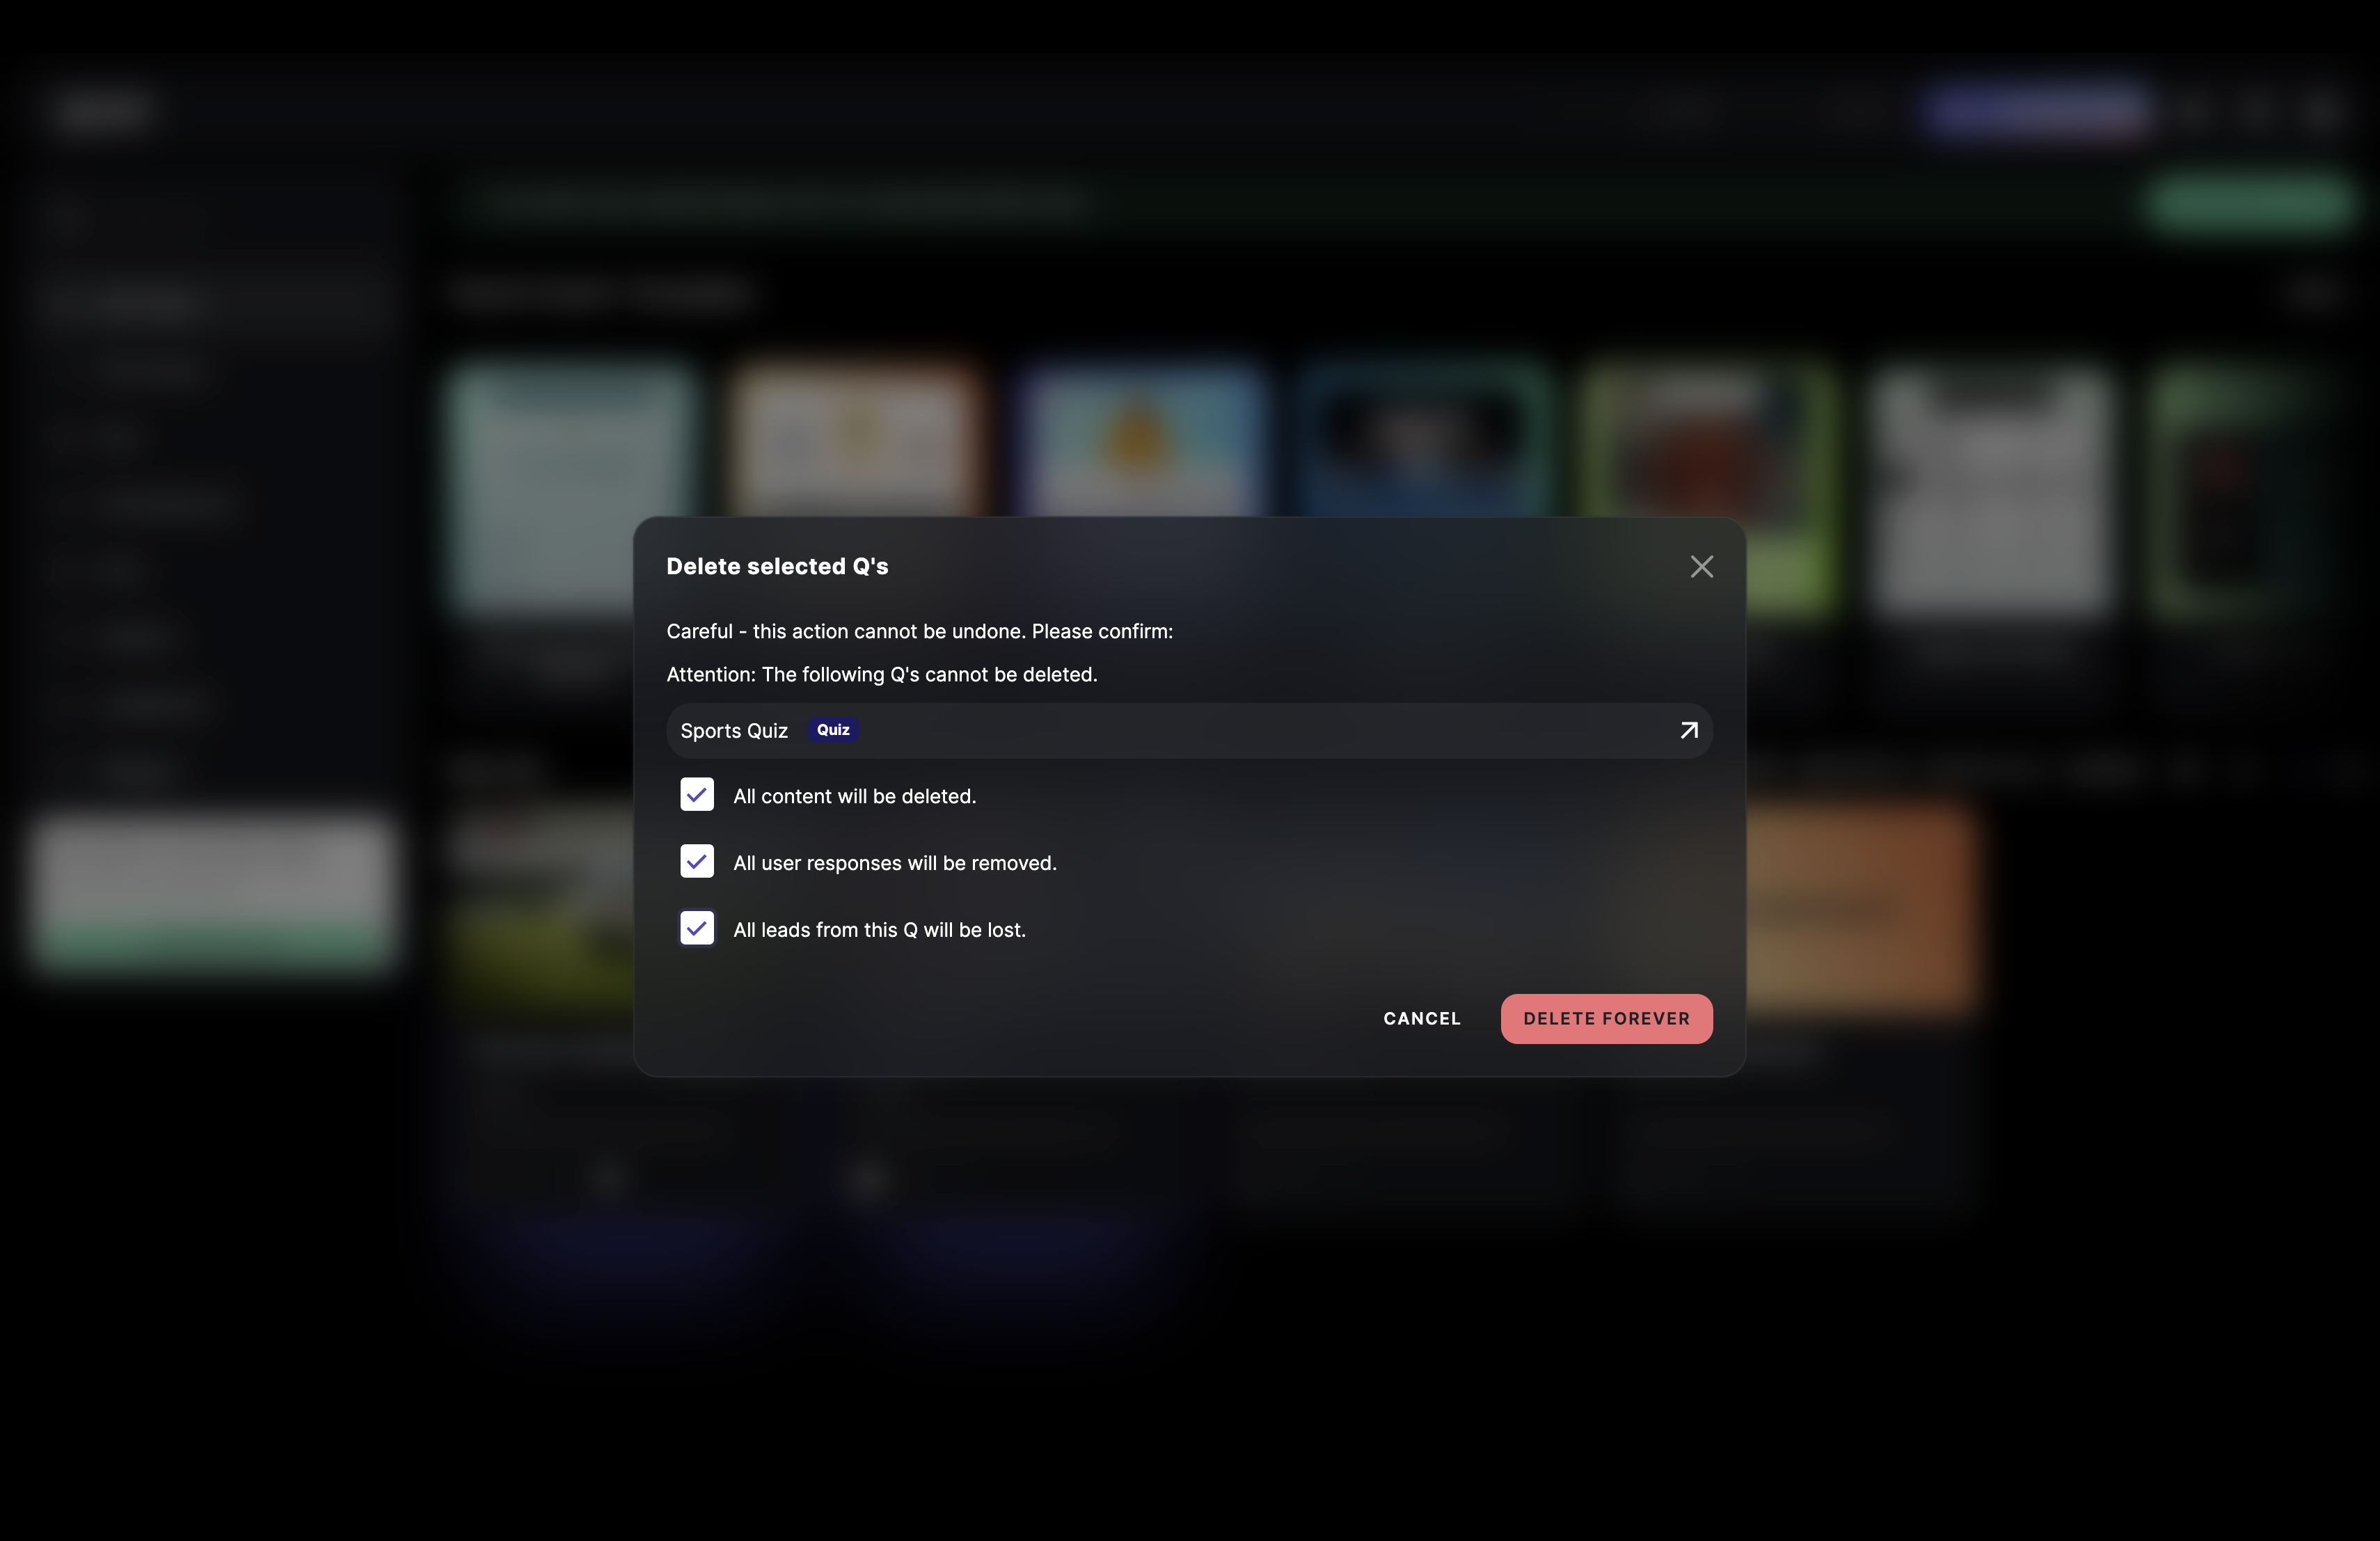
Apply bulk changes
- In the Creator, click on SELECT.

- Select the content items you want to change and click on the action button required.
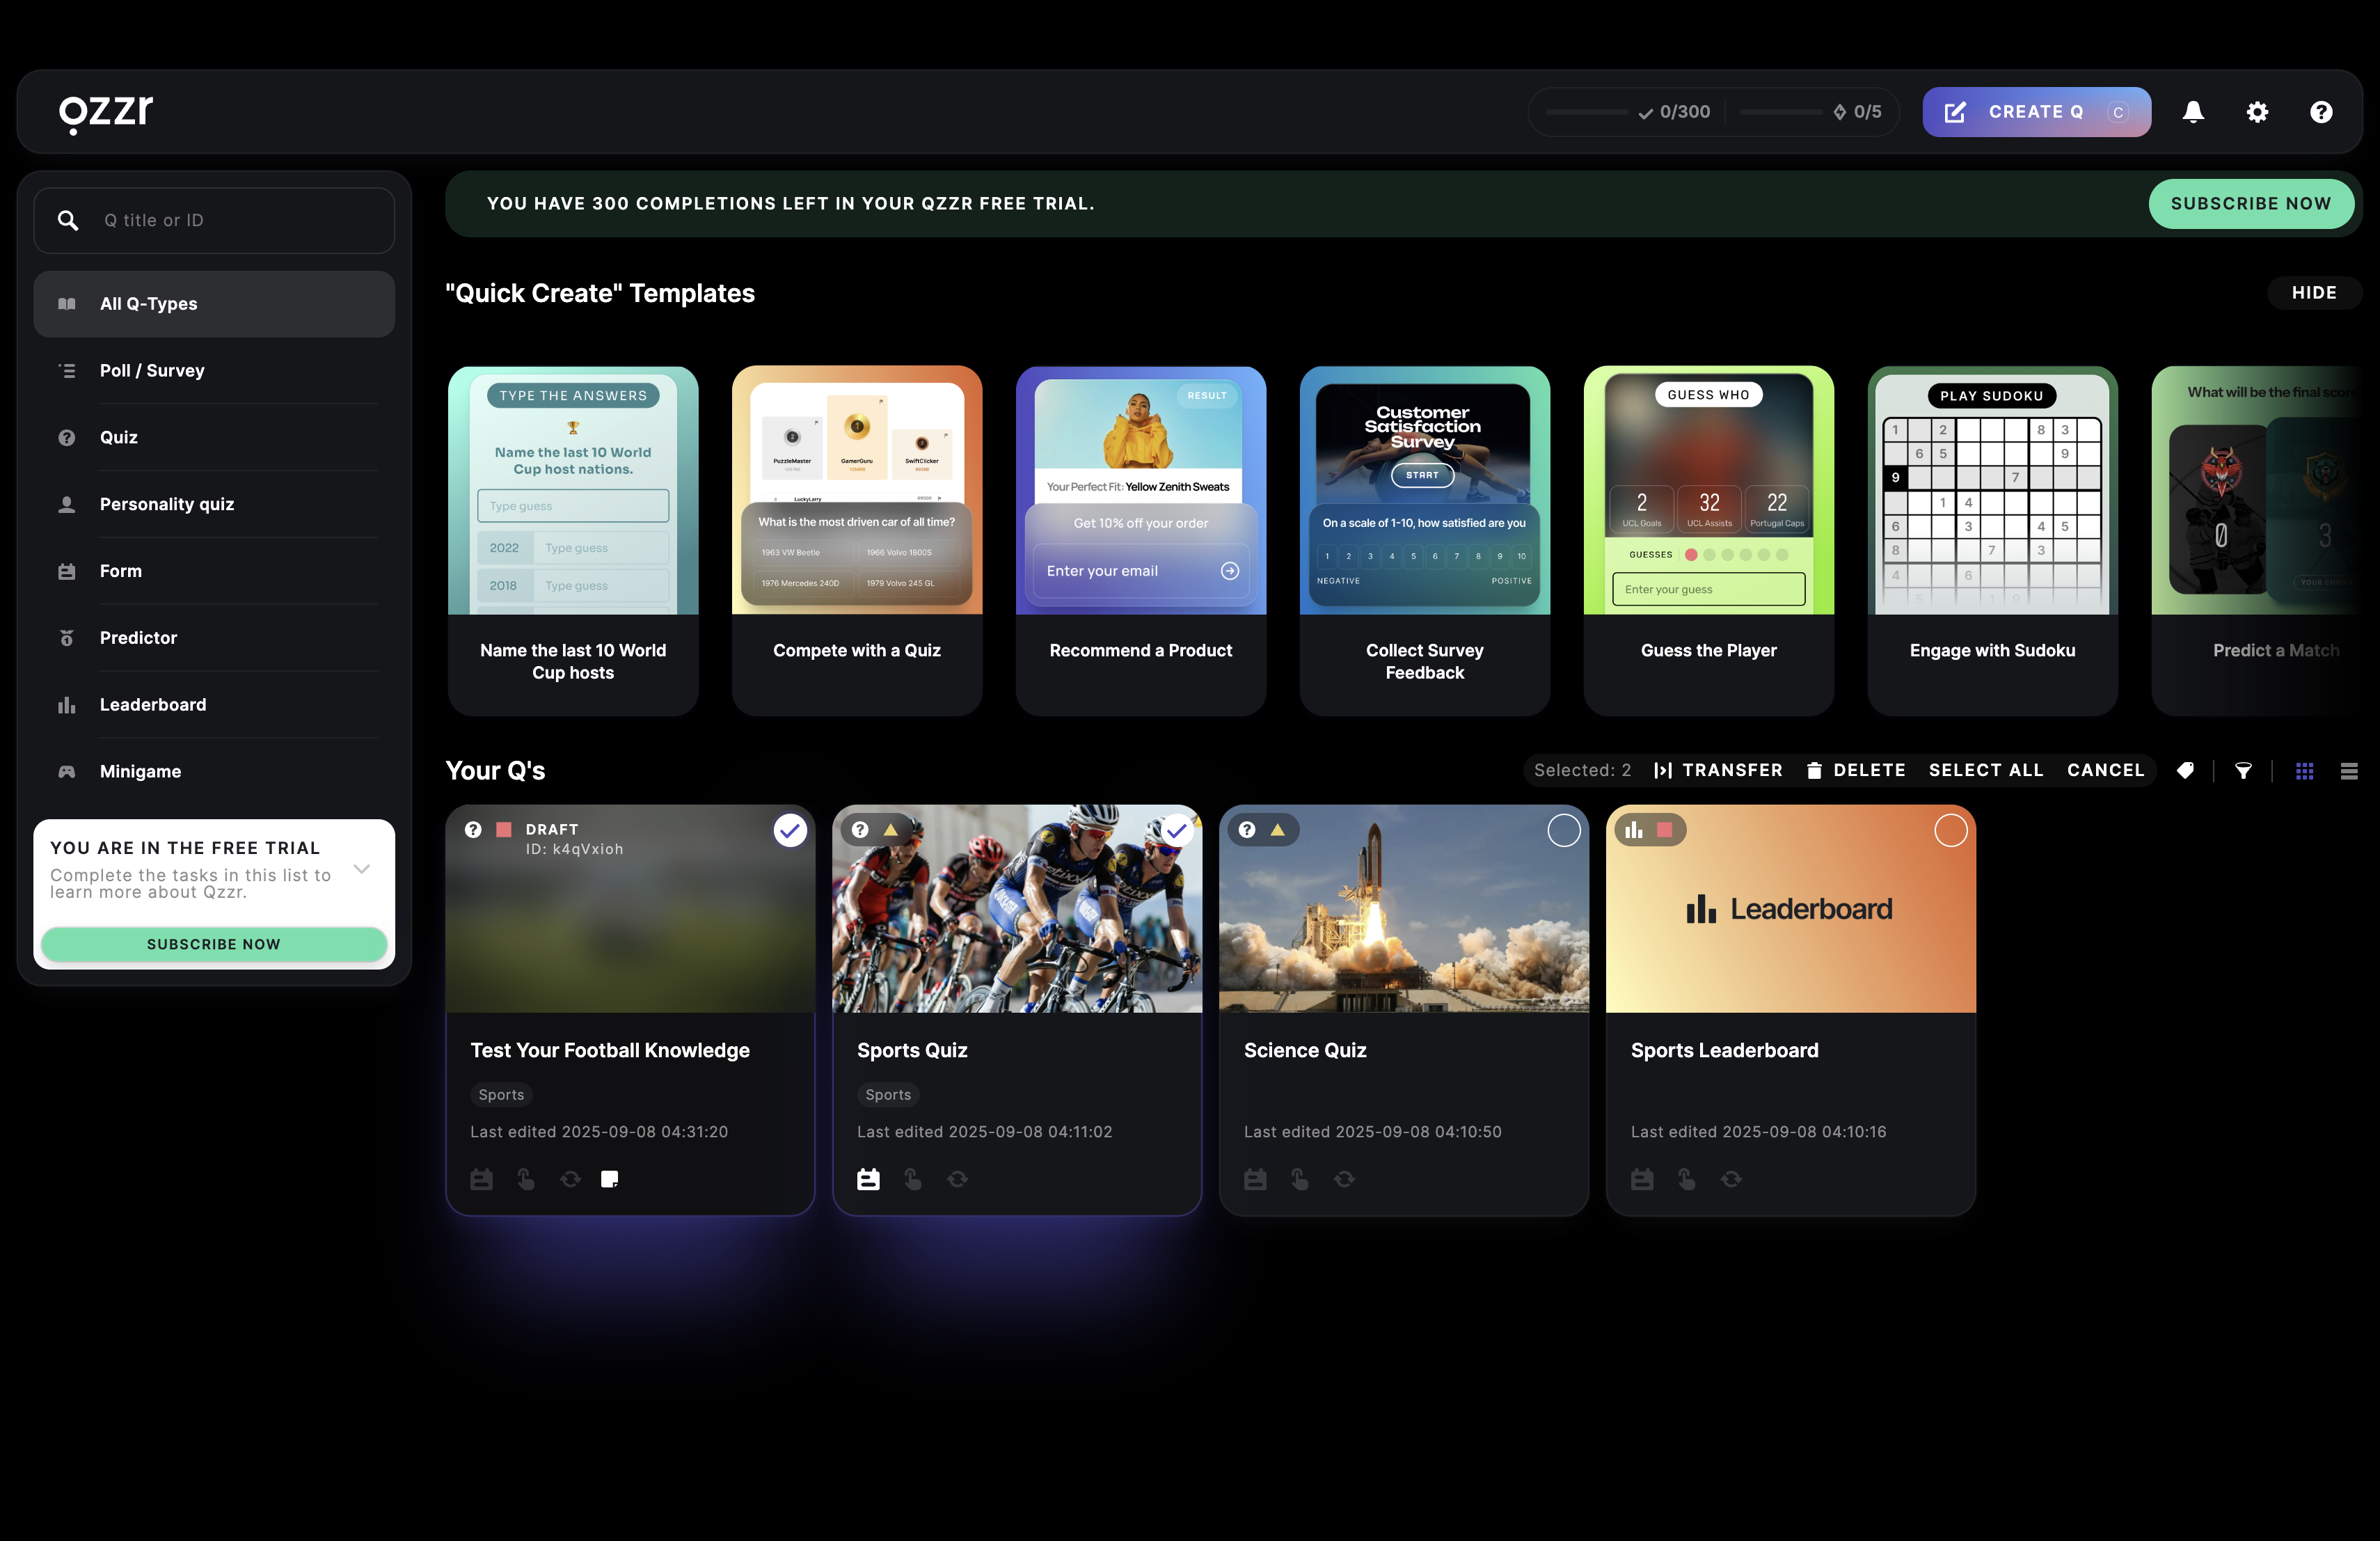
- If you choose to delete a content or multiple content items, check all the boxes in the pop up and click on DELETE FOREVER.